1. In order to allow your ISU to schedule interviews you'll need to create a User Based Security Group
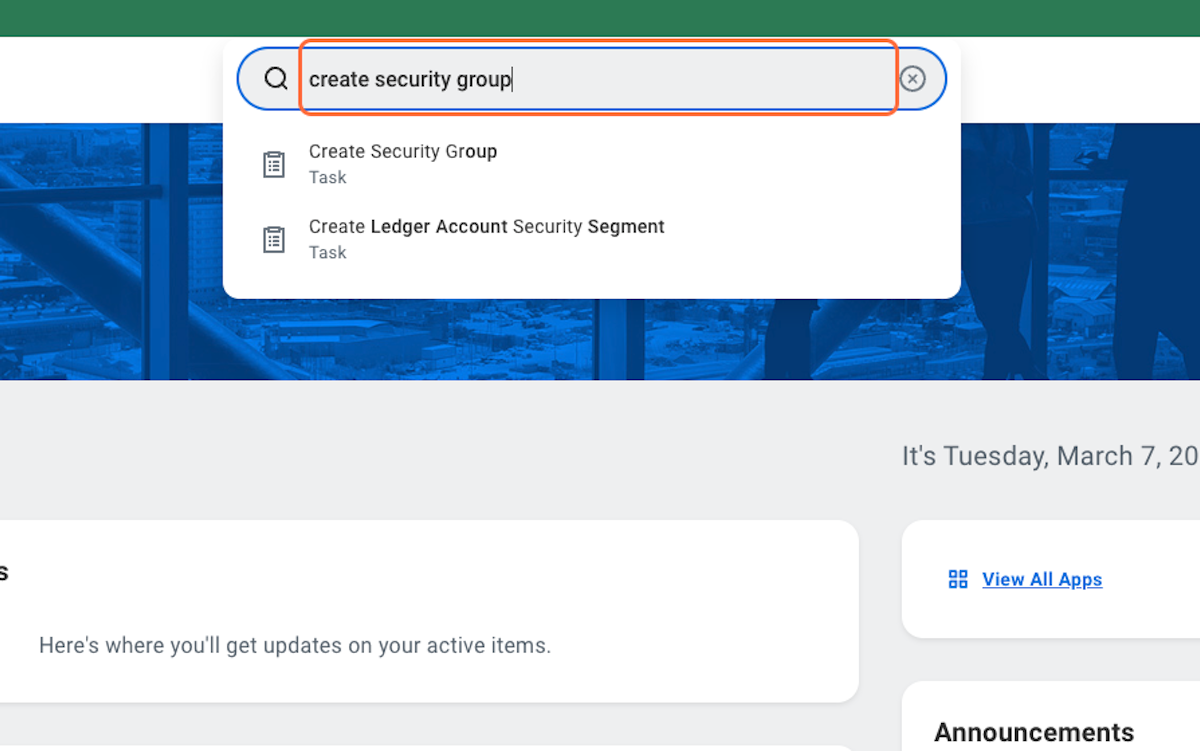
2. From your Workday home page search for 'Create security group'
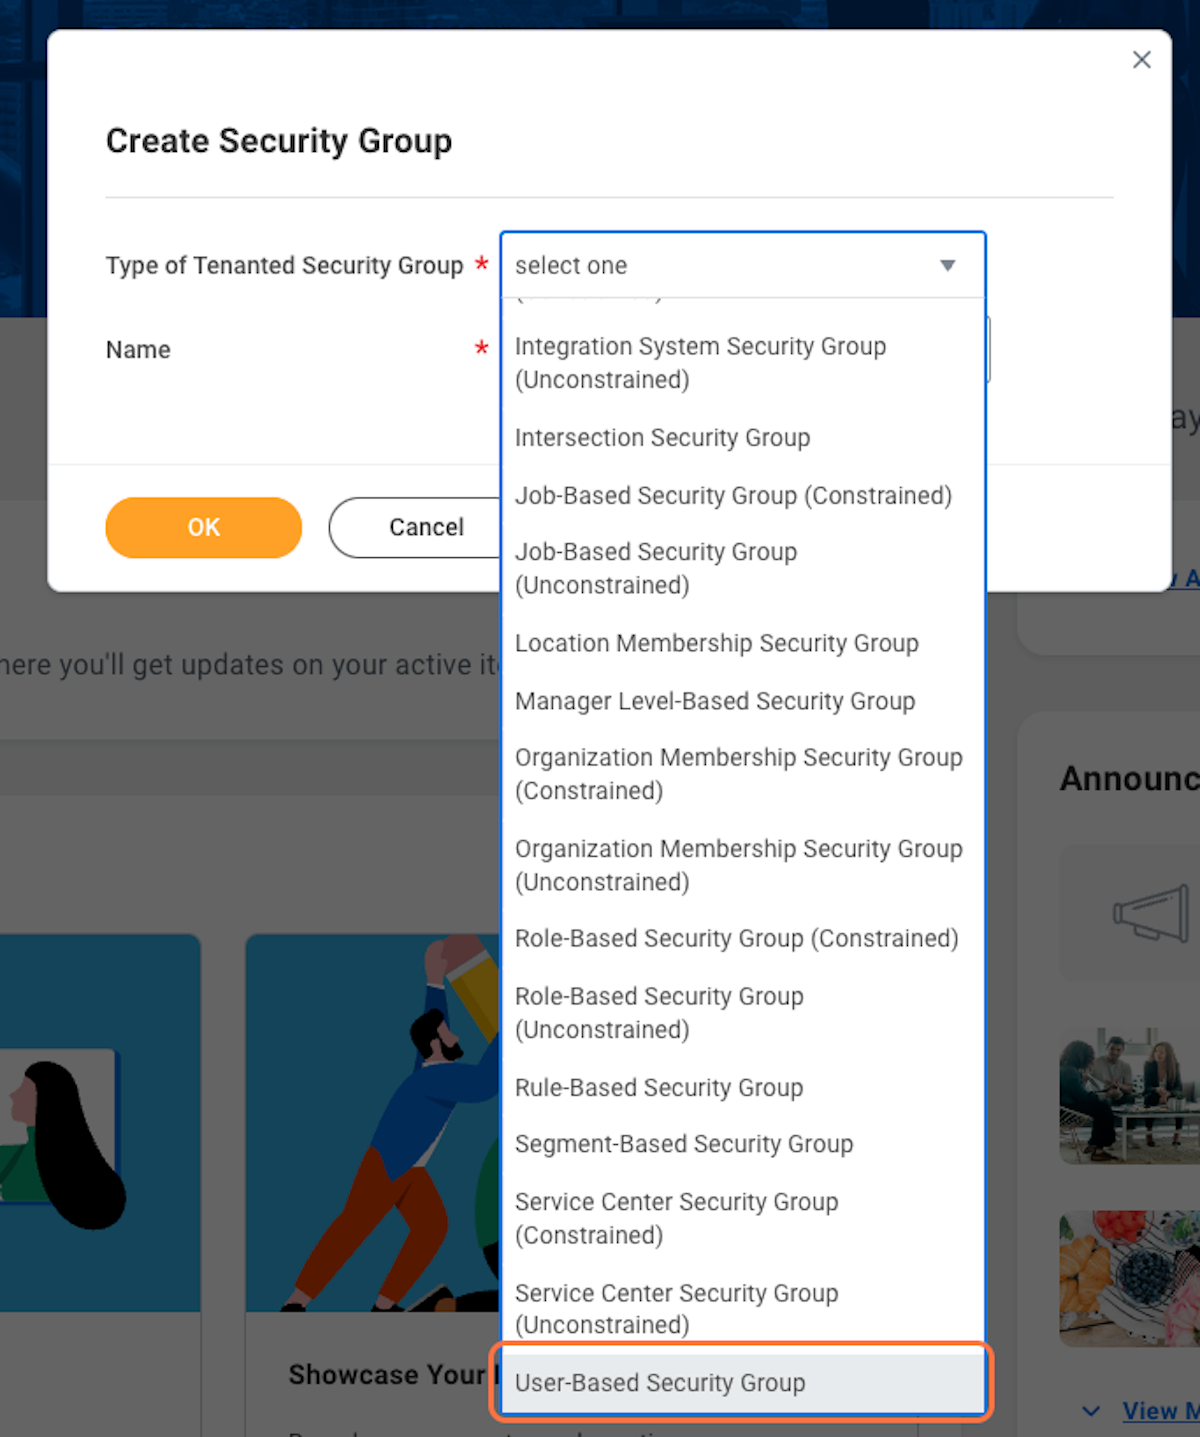
3. For "Type of Tenanted Security Group" select "User Based Security Group"
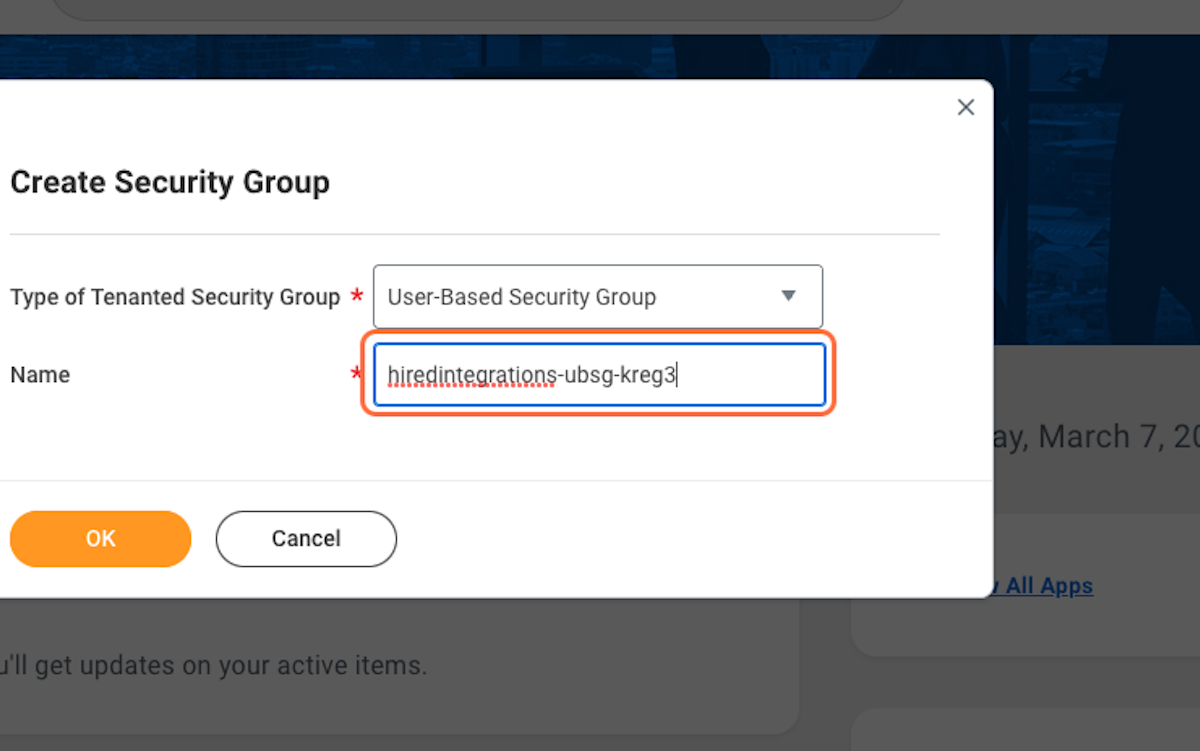
4. Give your User-Based Security Group a name and click OK
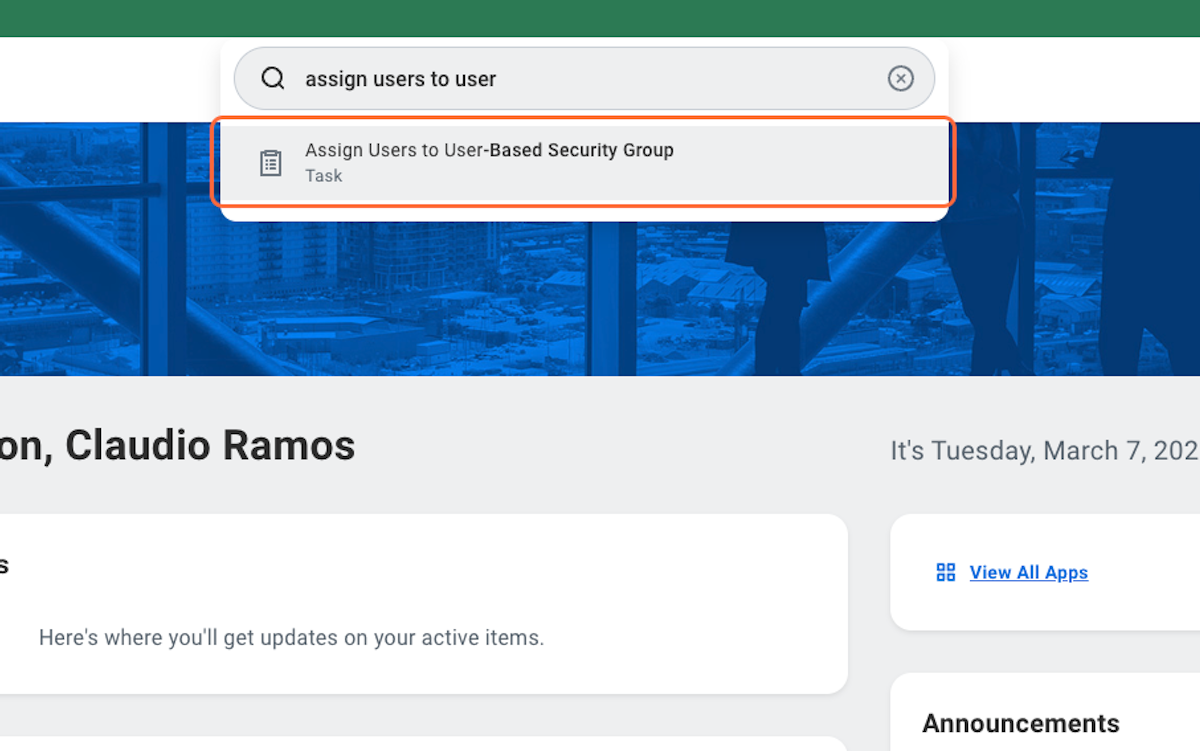
5. Next search for "Assign Users to User-Based Security Group"
6. Search for your newly created User Based Security Group, select it and press OK
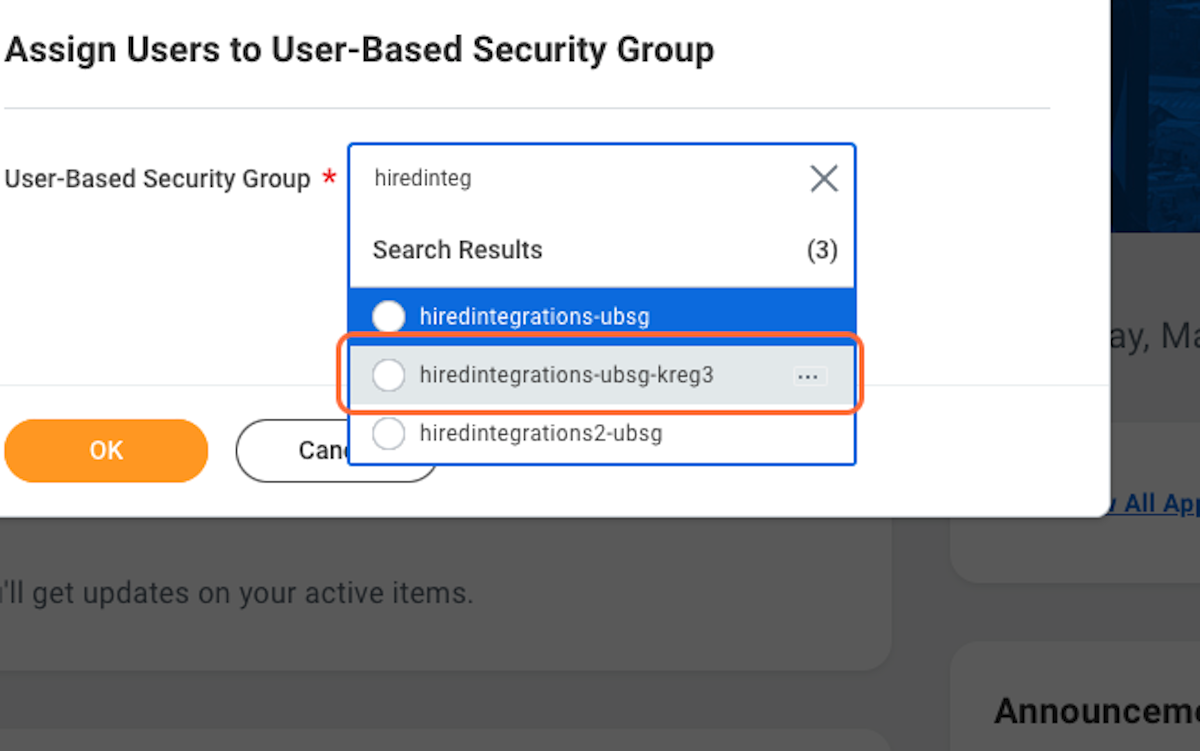
7. Type the name of the Integration System user you've connected to Hired, select it and click OK

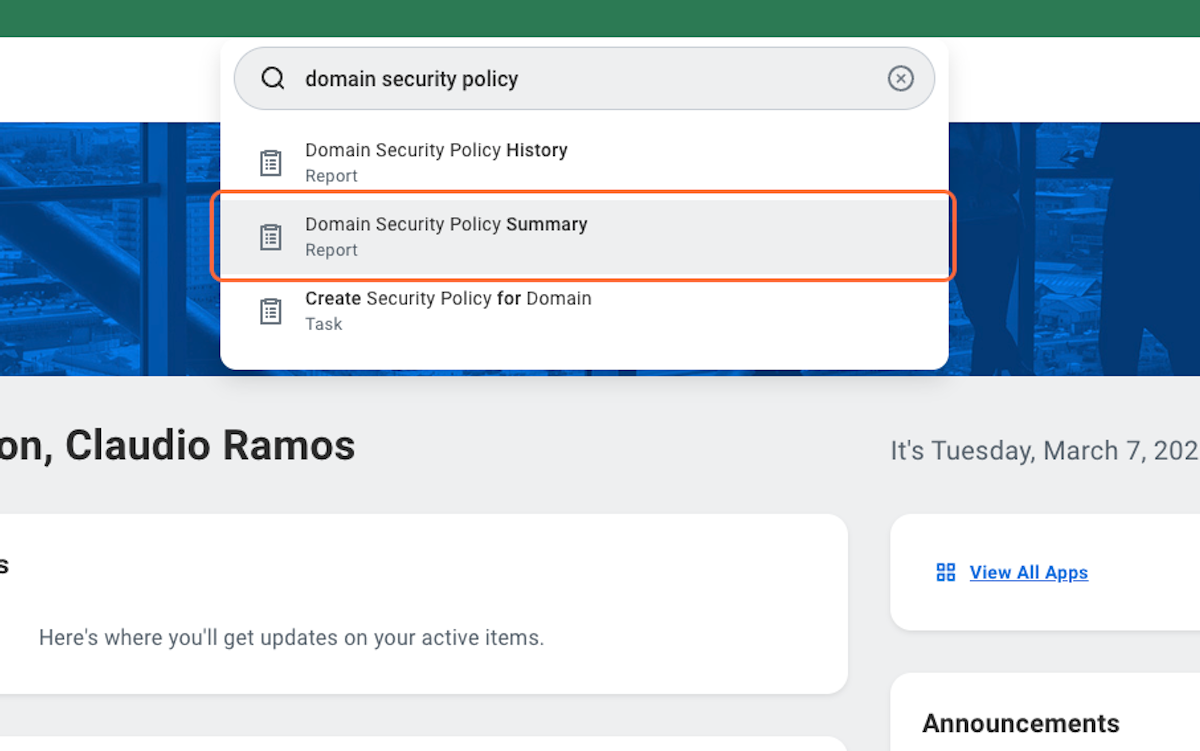
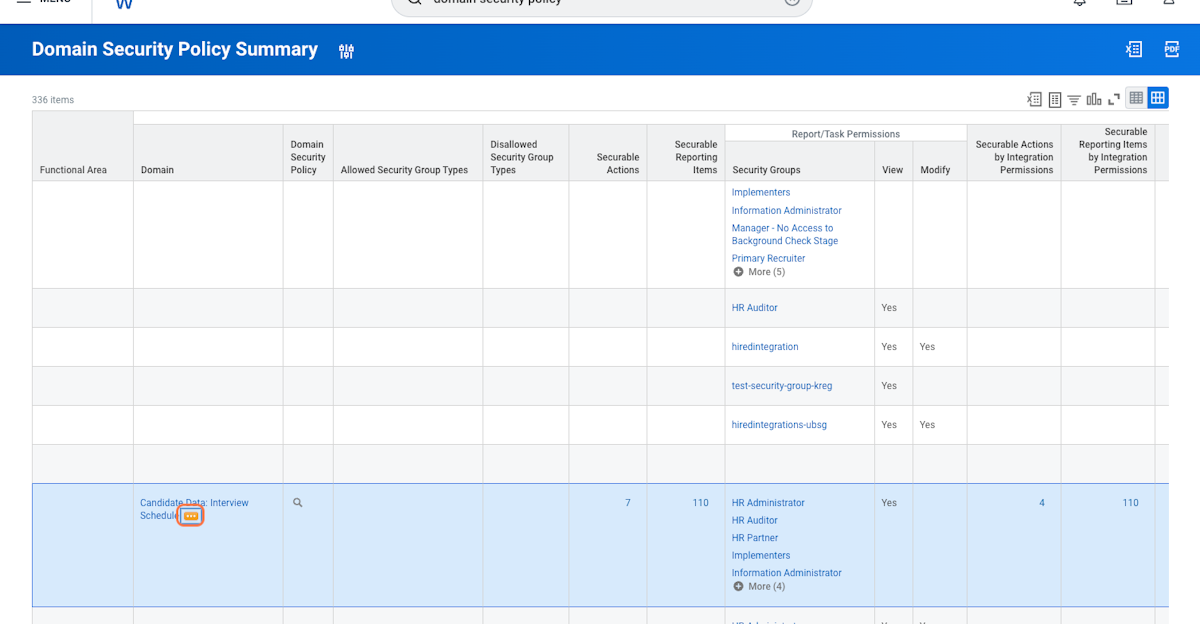
8. Search for "Domain security policy summary"
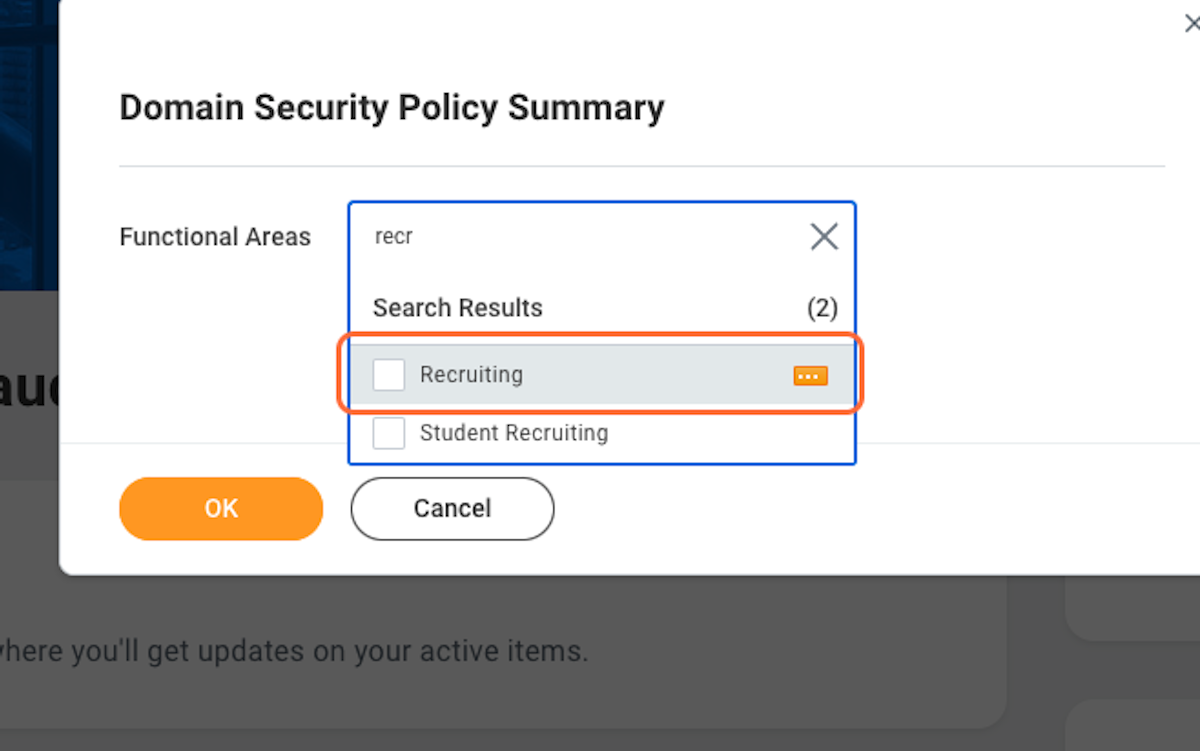
9. Search for "recruiting" in the Functional Areas box, select it and press OK
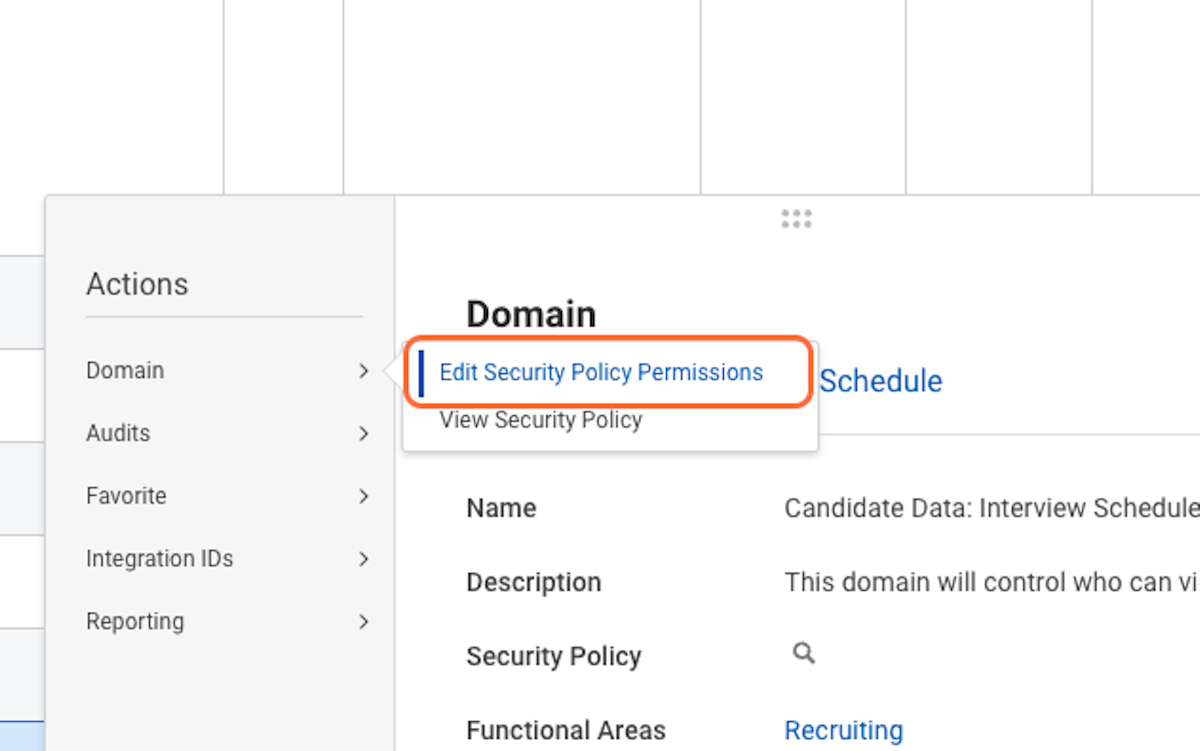
10. Scroll down to find the "Candidate Data: Interview Schedule" domain, hover over its name and click on the three dots that appear
11. Click on Edit Security Policy Permissions
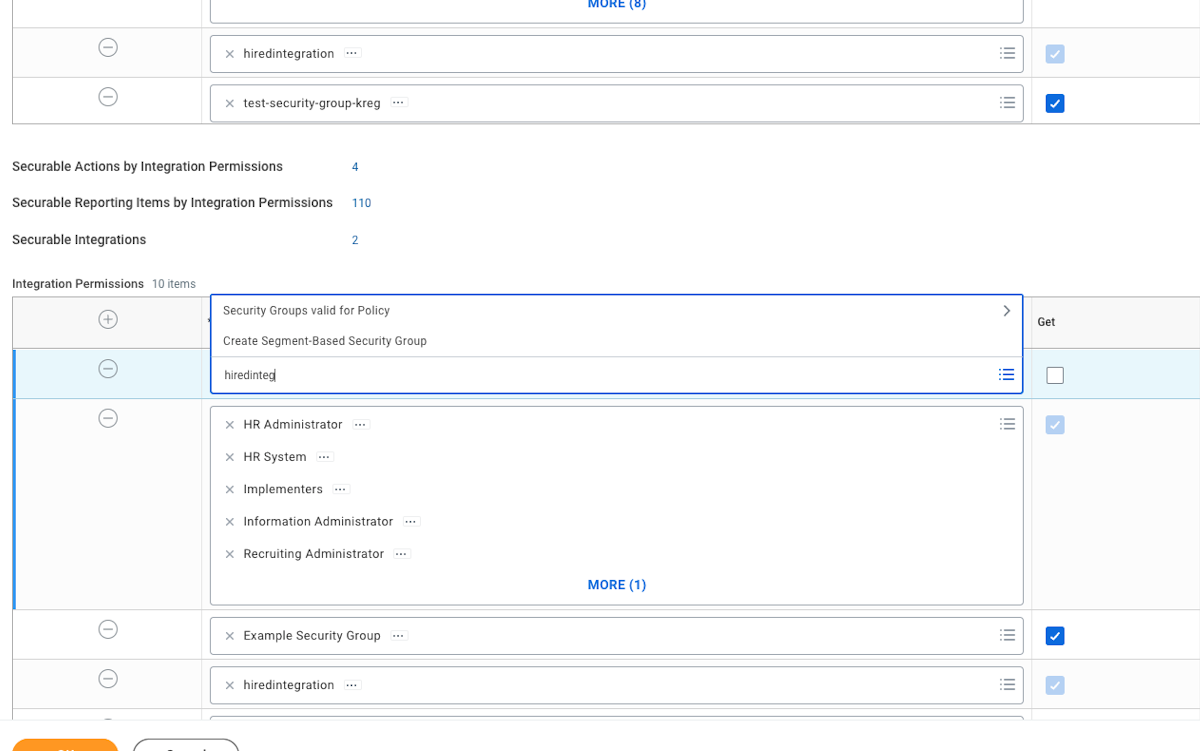
12. In the "Report/Task Permissions" section click the + sign
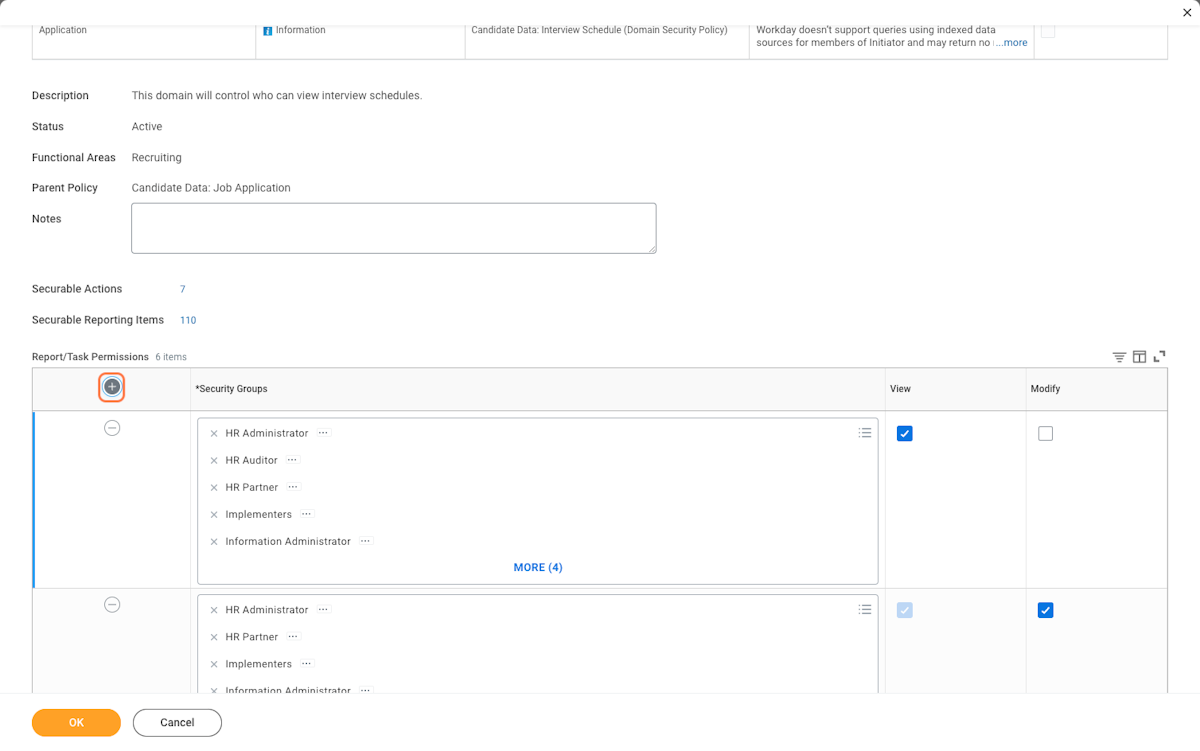
13. Search for your newly created User Based Security Group, and select it
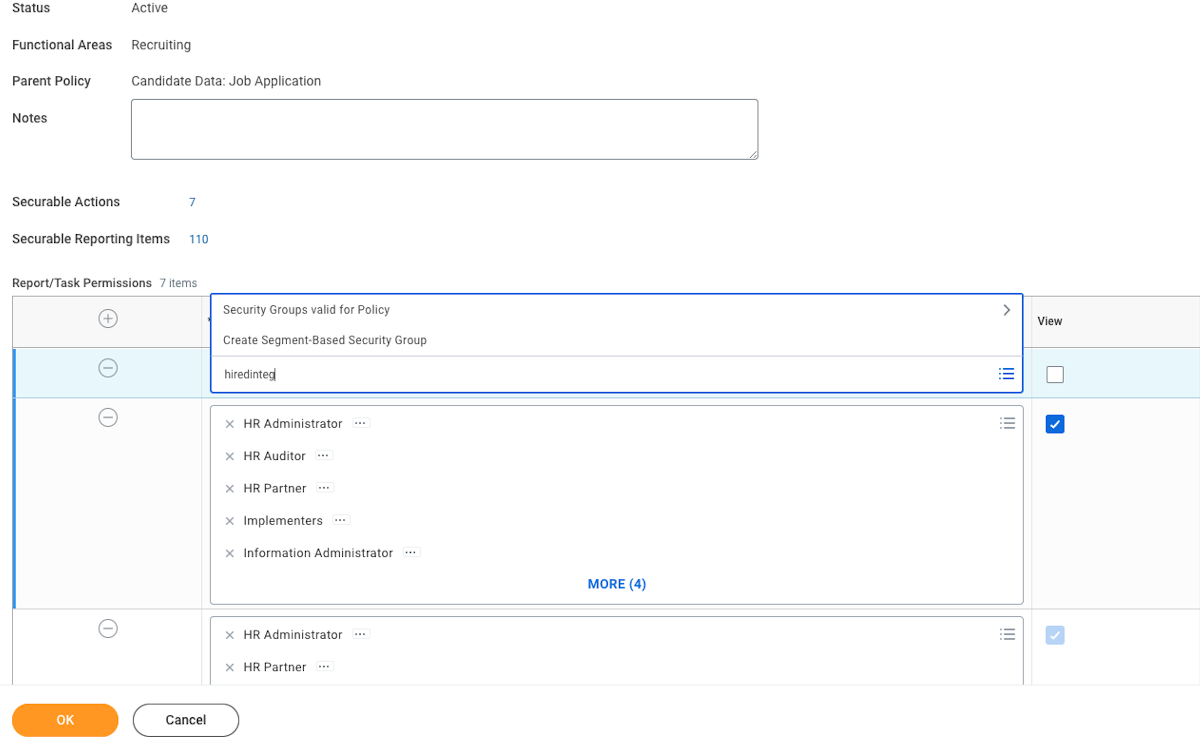
14. Check both the "View" and "Modify" check boxes

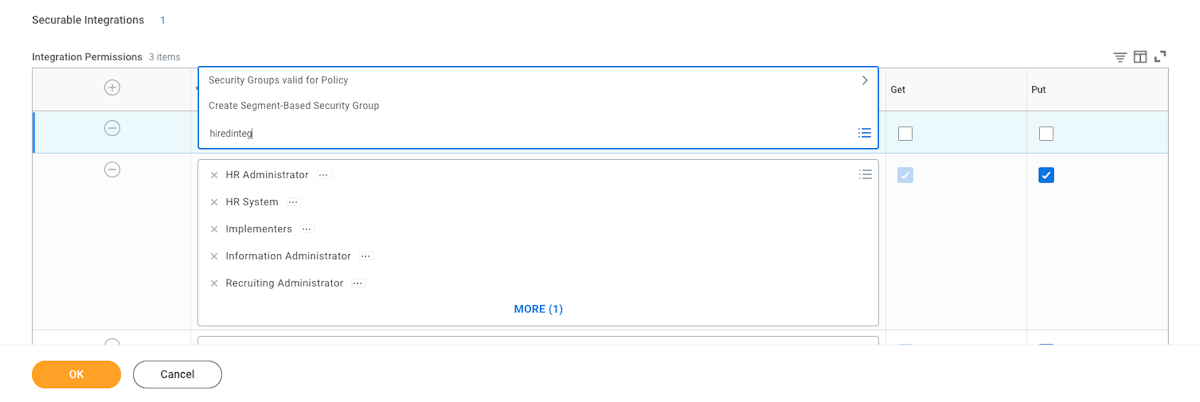
15. Scroll down to the "Integration Permissions" section and repeat step 13, check both "Get" and "Put" checkboxes and click OK
16. Search for "Edit Business Process for Security Policy"
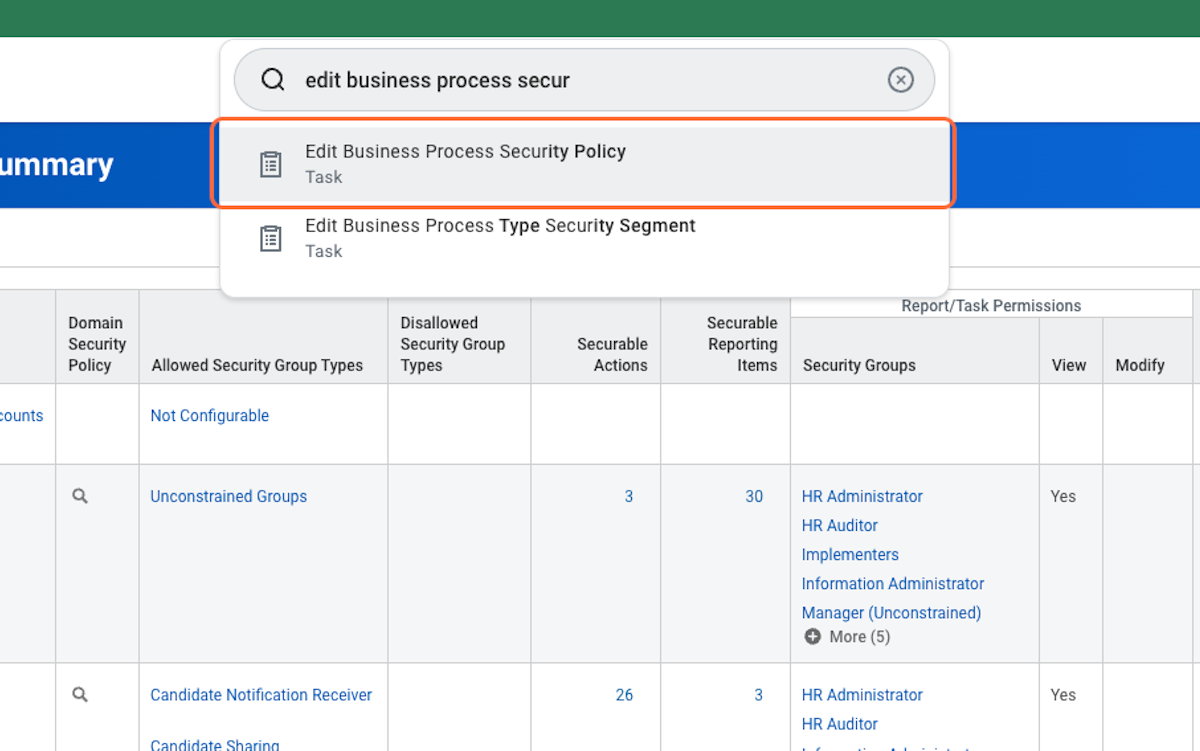
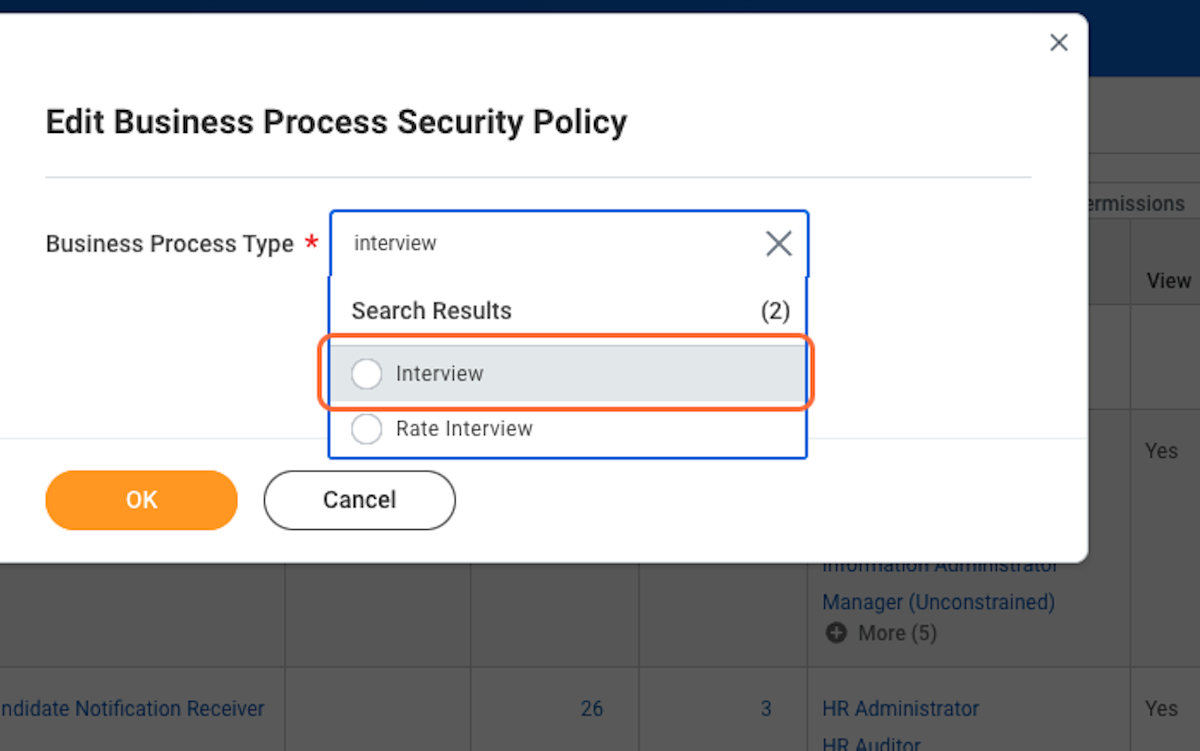
17. For Business Process Type search for "interview", select the "Interview" option, and click OK
18. Locate the Schedule Interview Team action step
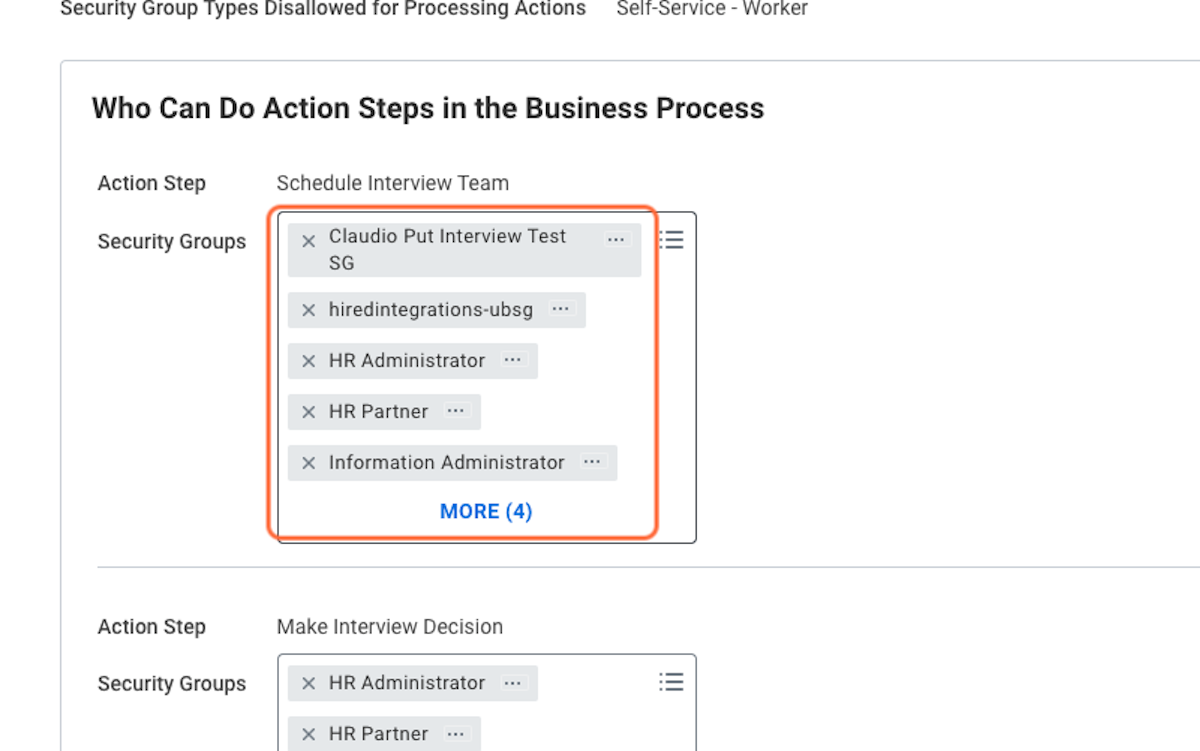
19. Search for your newly created User Based Security Group, and select it
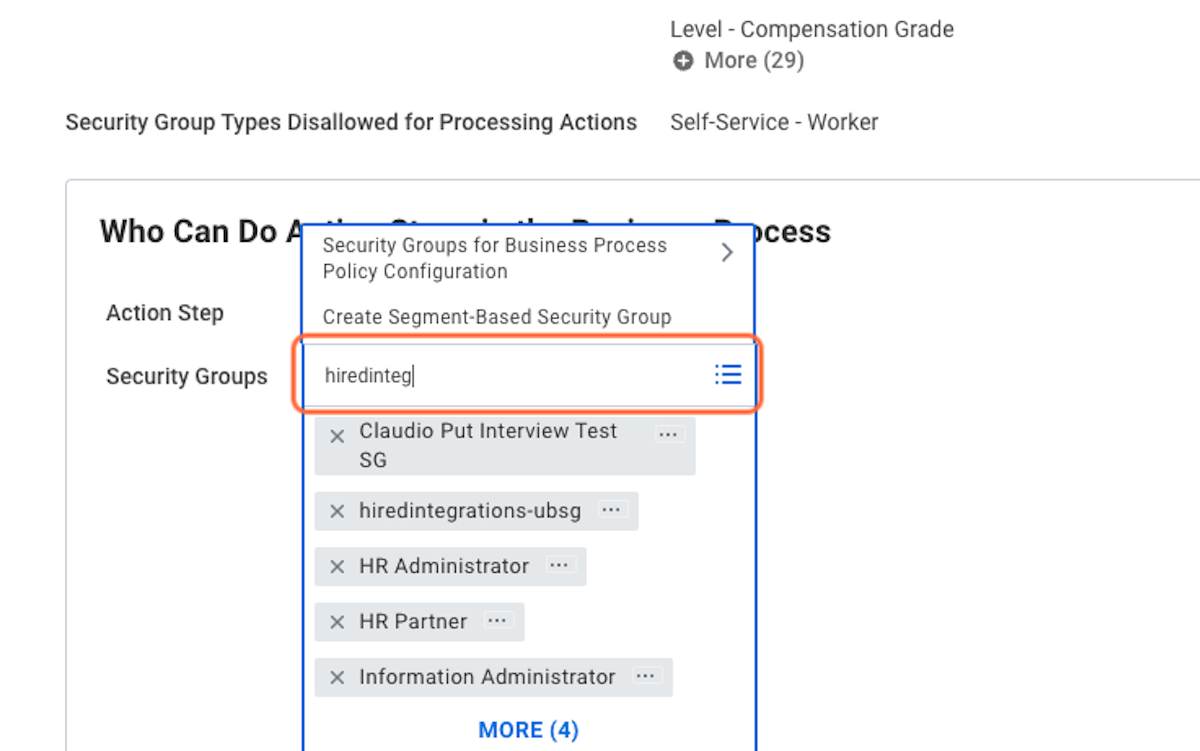
20. Scroll down and repeat this process for the "Schedule Interview" action step, and click OK

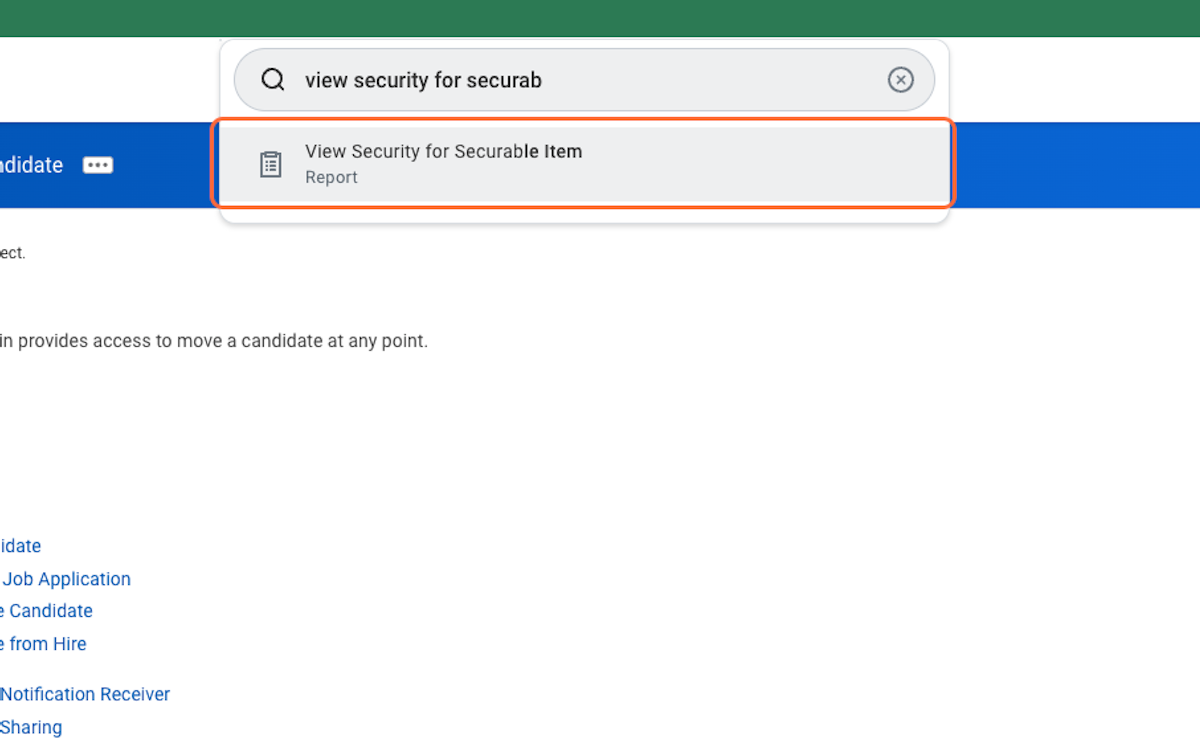
21. Search for "View security for securable item"
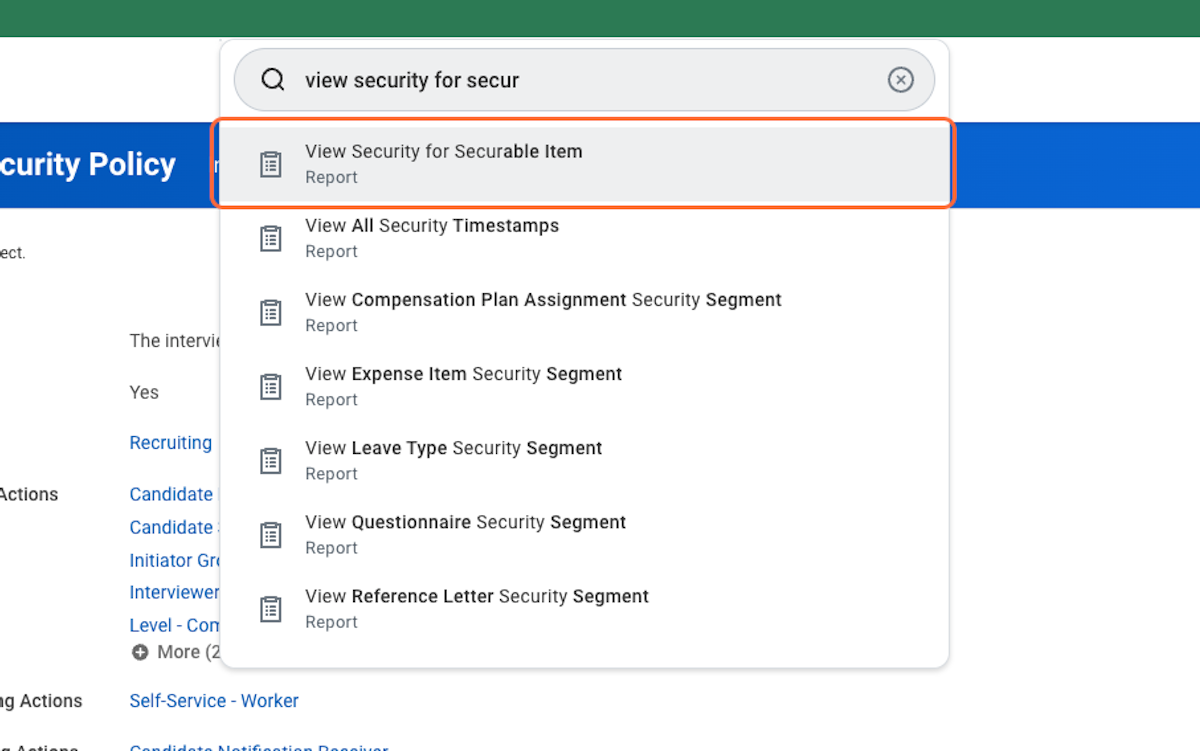
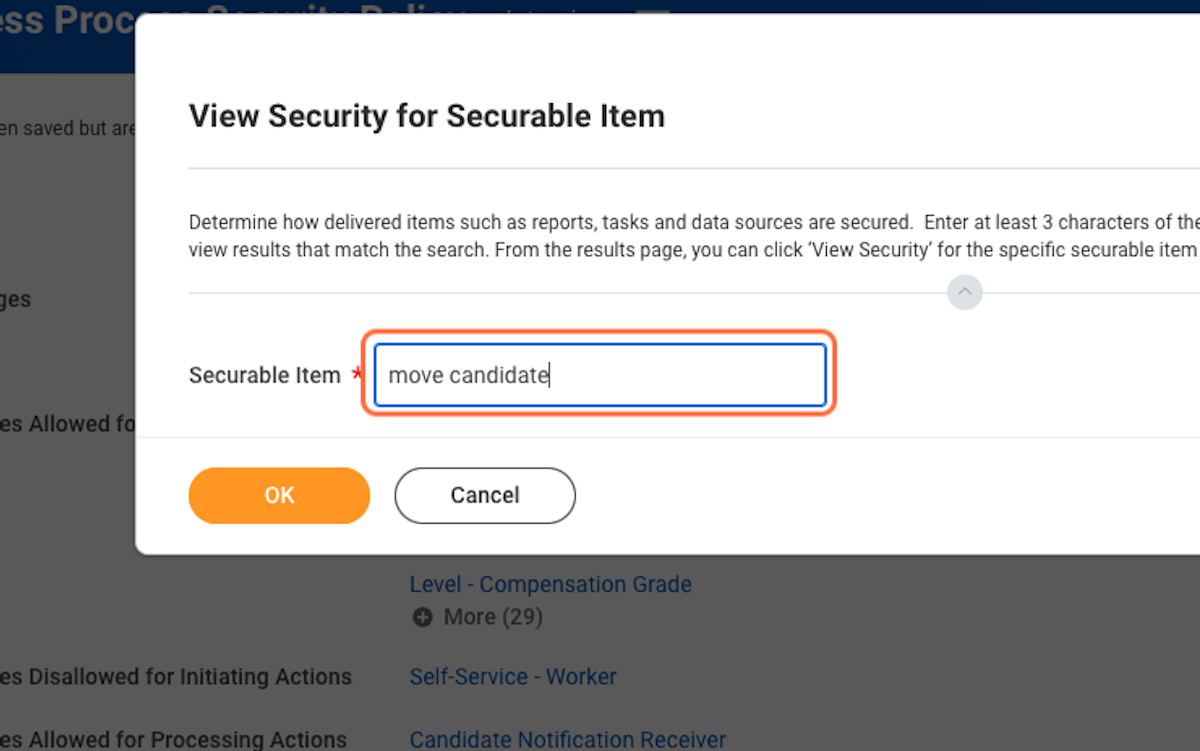
22. Type "move candidate" as the securable item and click OK
23. Look for the "Move Candidate (Web Service) (Web Service Task)", hover the text and click the menu button
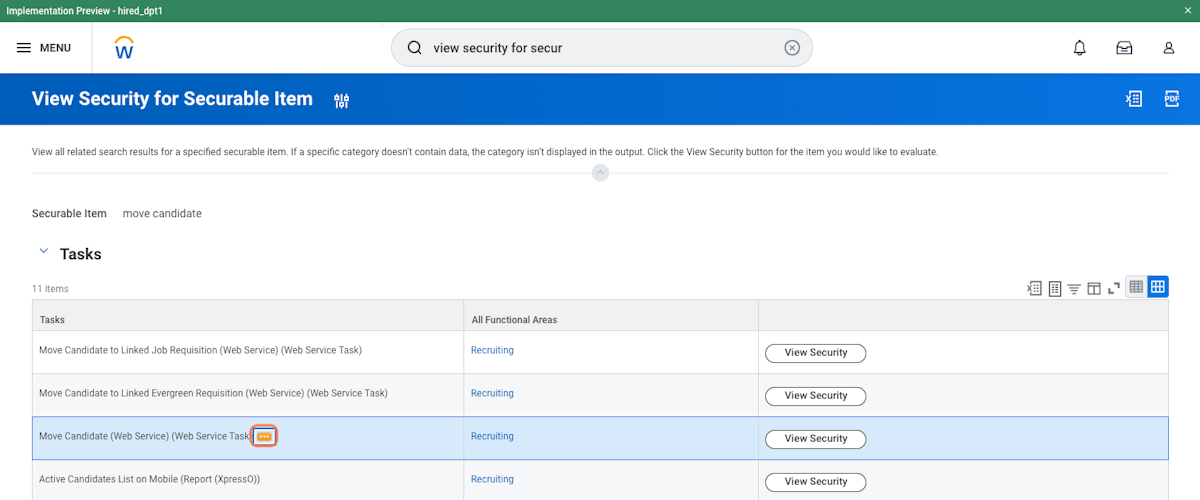
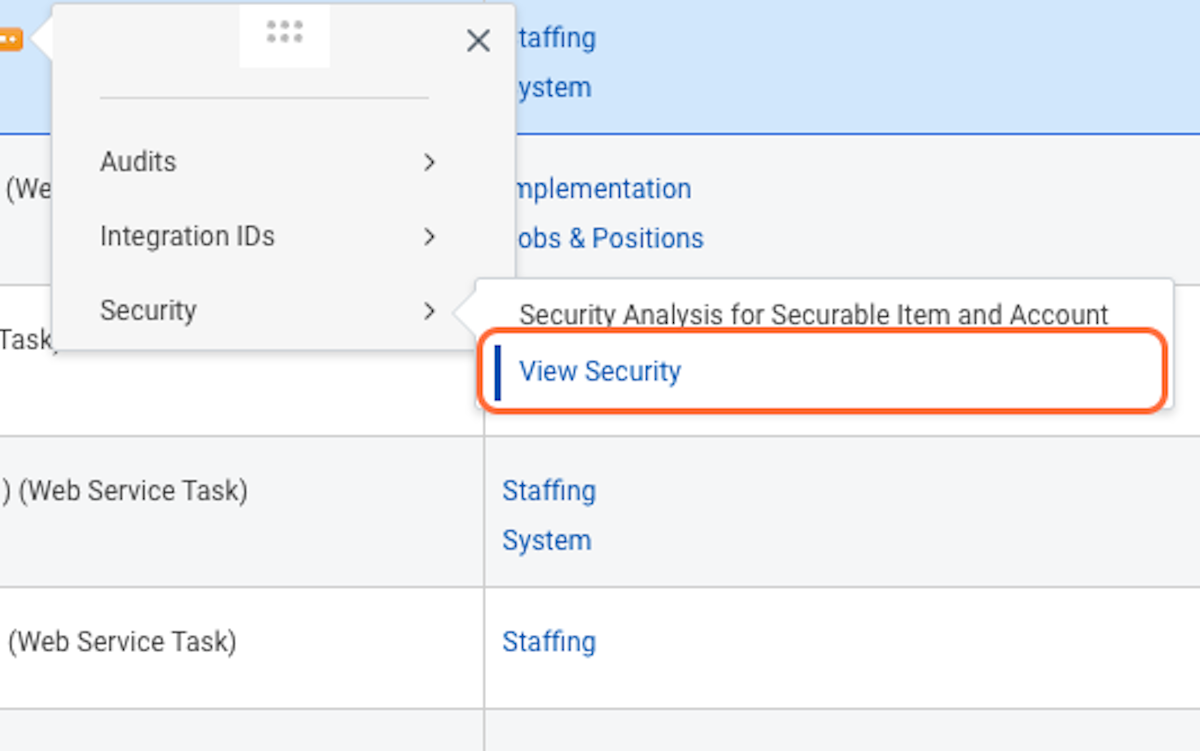
24. Hover over security and click on "View Security"

25. Hover over the "Move Candidate" security policy click the menu button
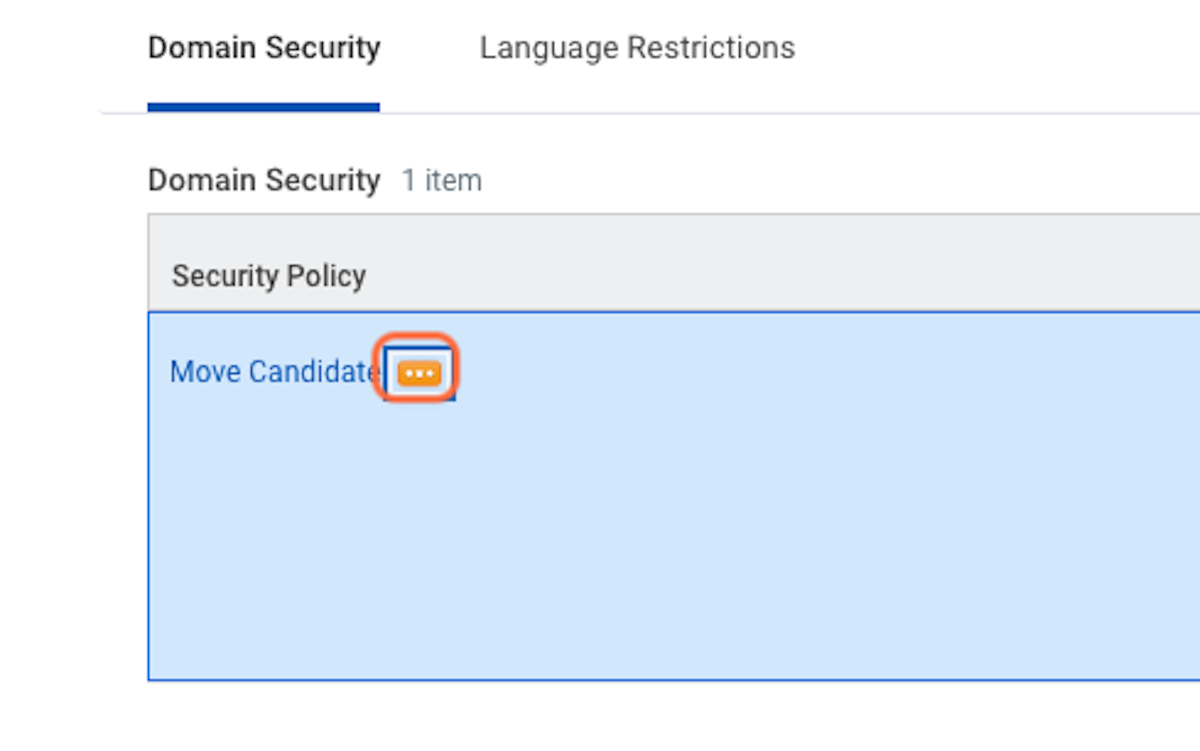
26. Hover over "Domain Security Policy" and click "Edit Permissions"
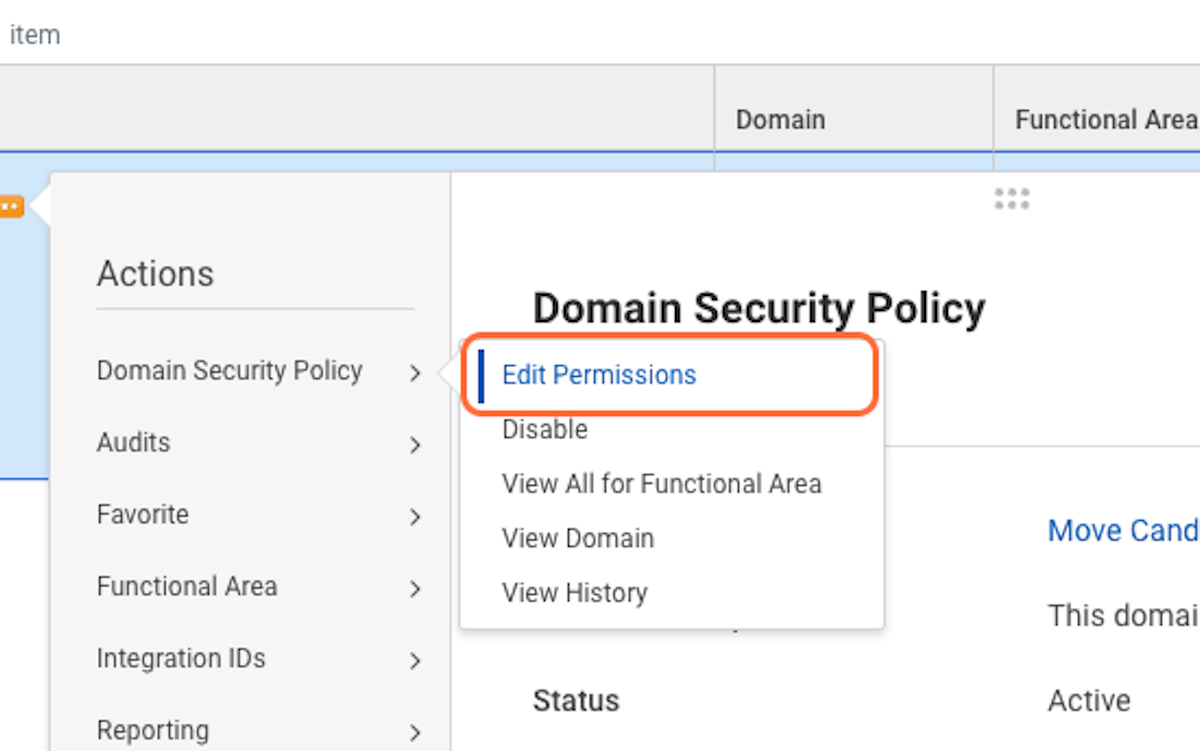
27. Click on the + sign under the "Report/Task Permissions" section
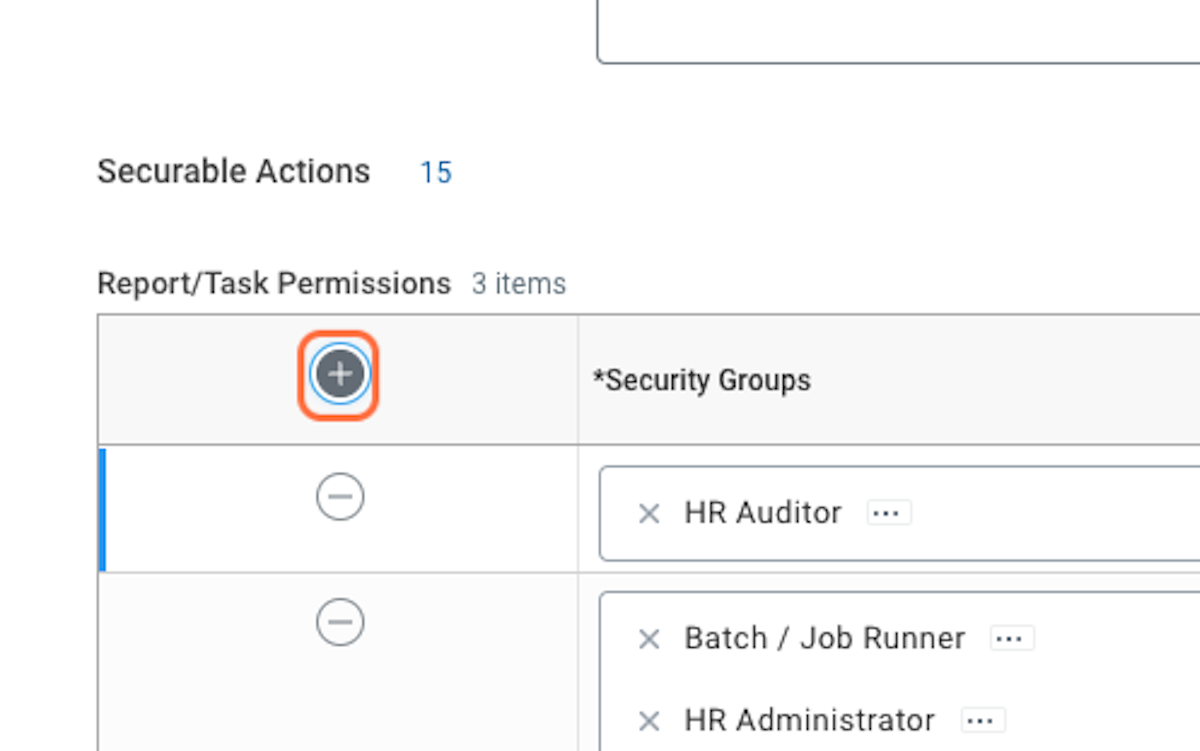
28. Search for your User Based Security Group, select it, and check both the "View" and "Modify" check boxes
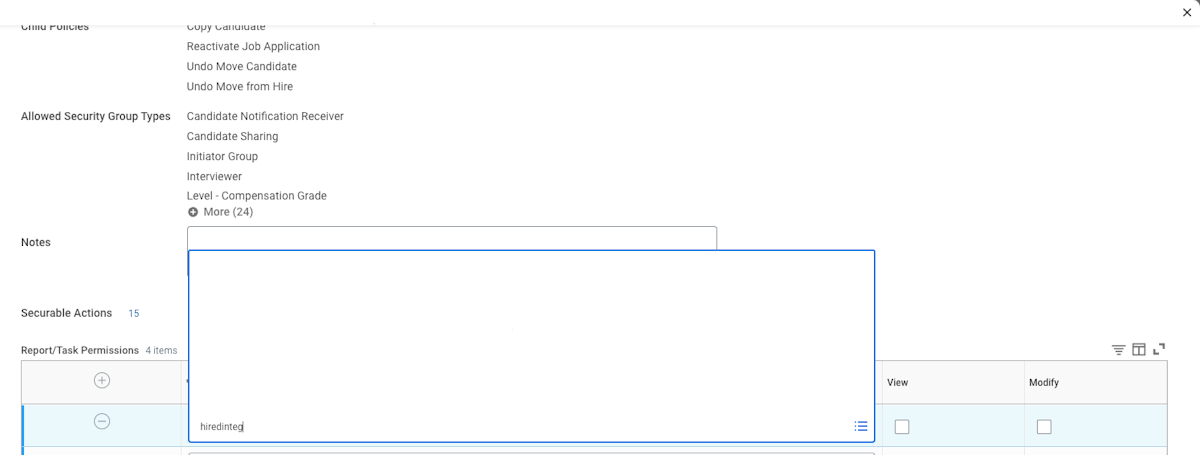
29. Scroll down to the "Integration Permissions" area, and repeat the step above selecting both the "Get" and "Put" checkboxes, then click OK
30. Search for "View security for securable item"
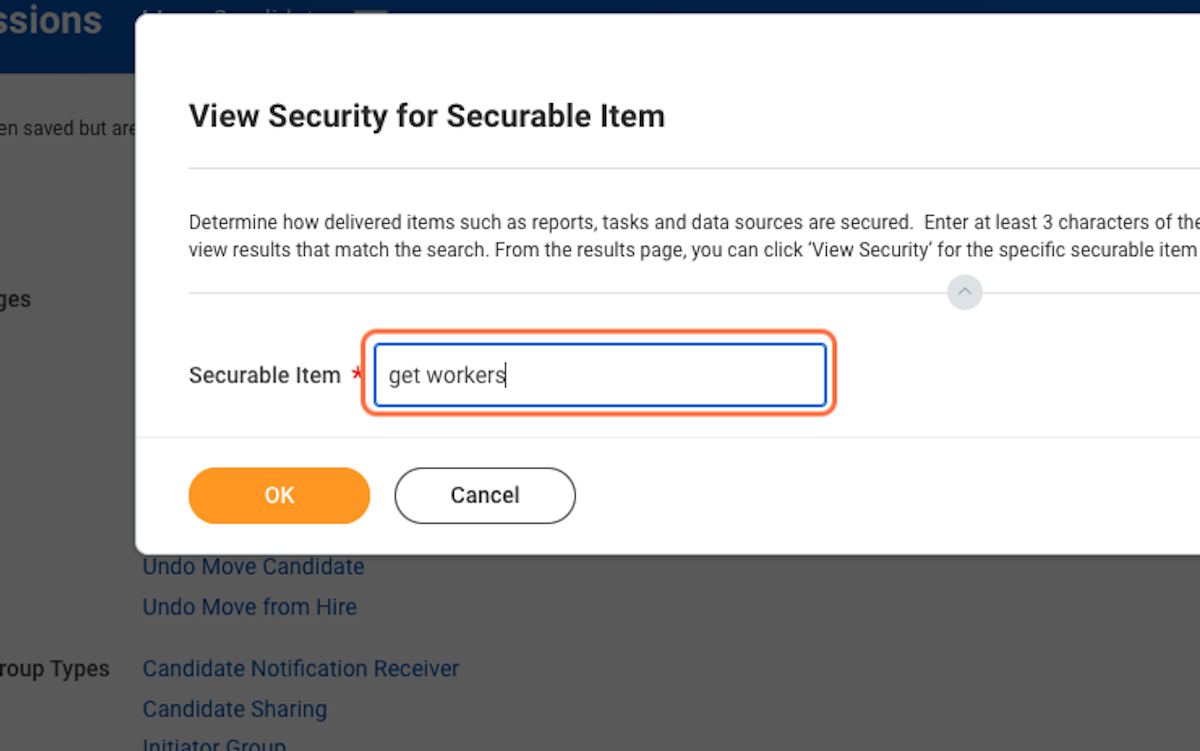
31. Type "get workers" in the Securable Item box and click OK
32. Hover over the "Get Workers (Web Service) (Web Service Task)" task, and click the menu button
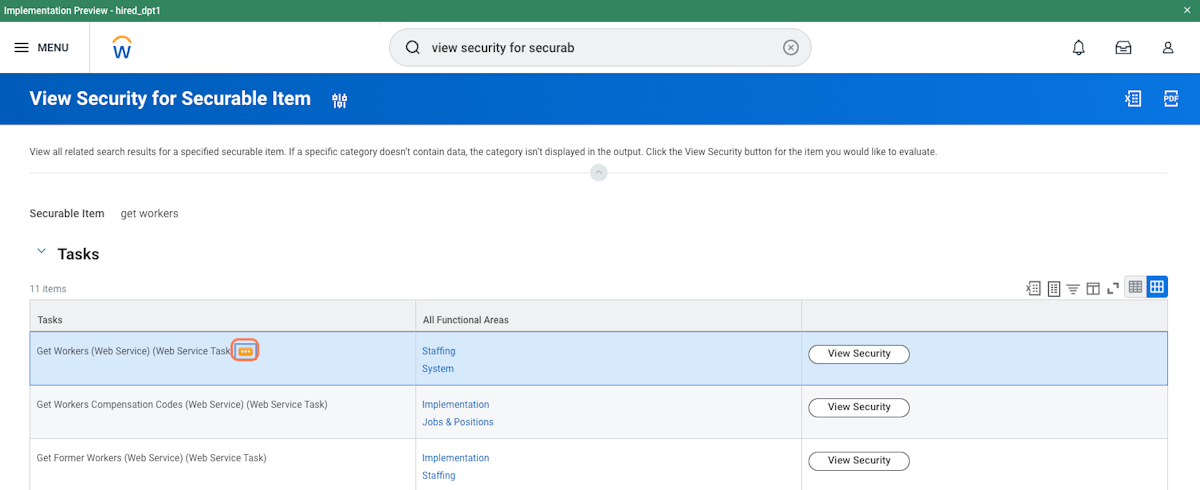
33. Hover over Security and click "View Security"
34. Hover over "Worker Data" Public Worker Reports" and click the menu button
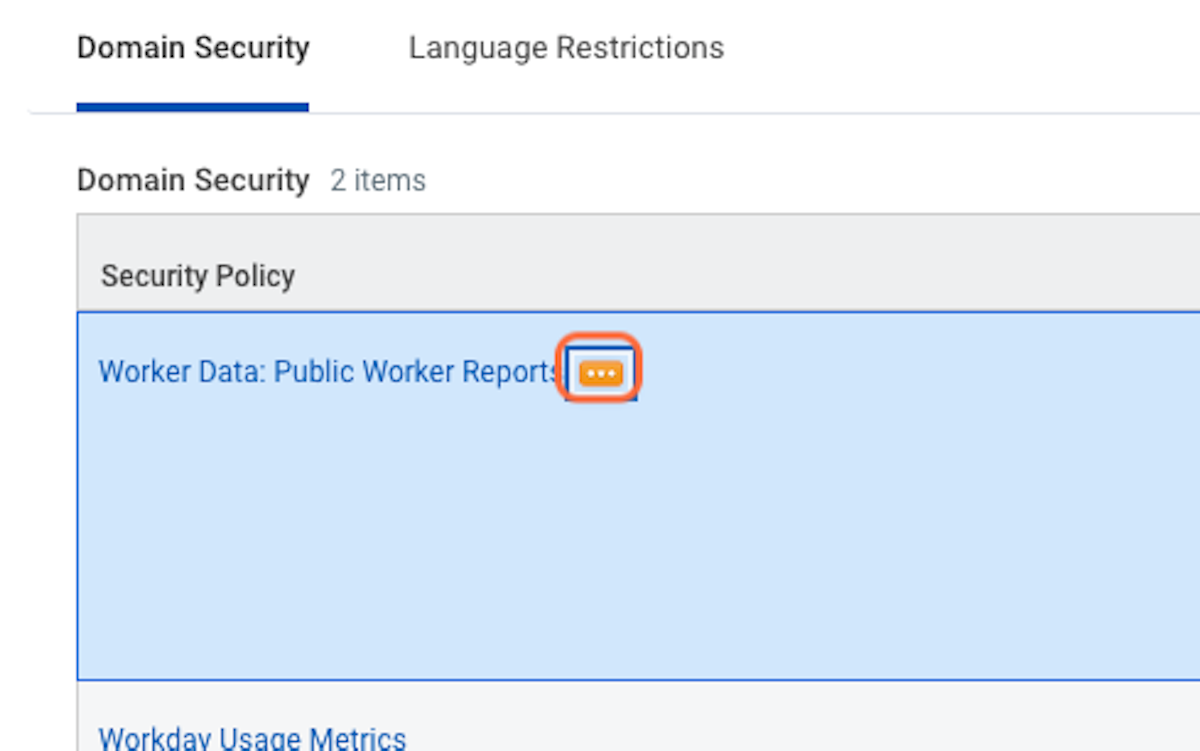
35. Hover over "Domain Security Policy" and click "Edit Permission"
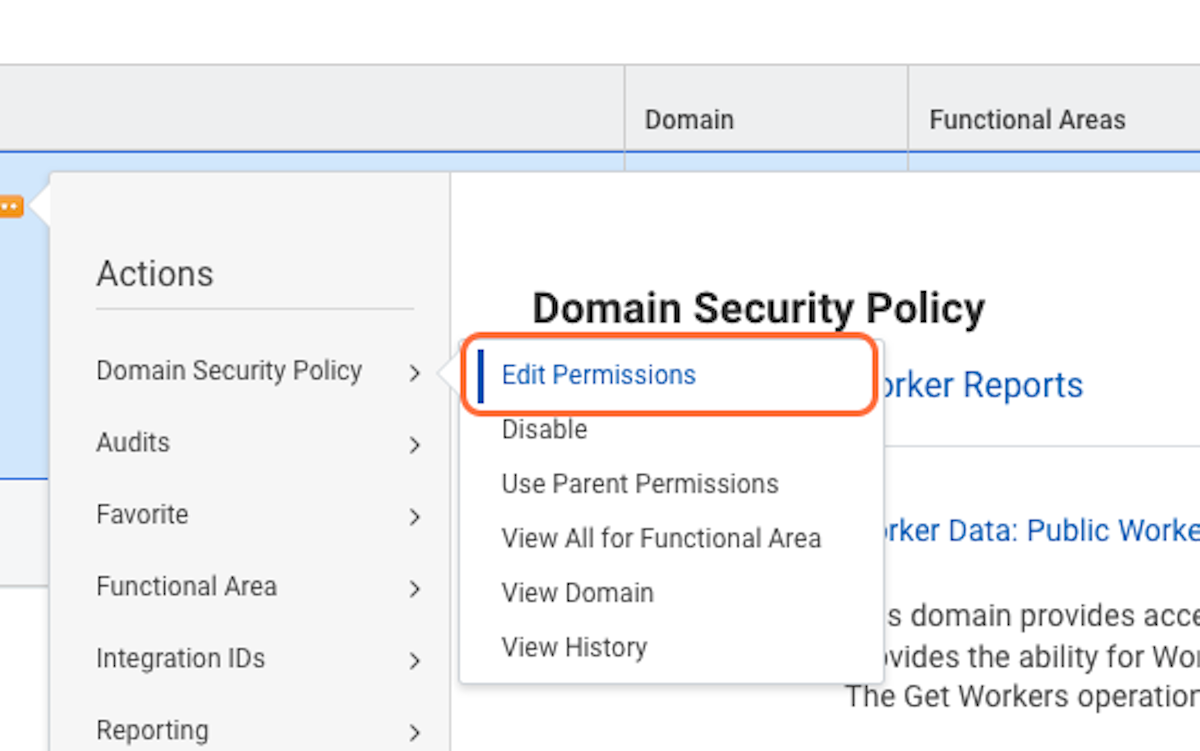
36. In the "Report/Task Permissions" section click the + sign. Search for your newly created User Based Security Group, and select it.
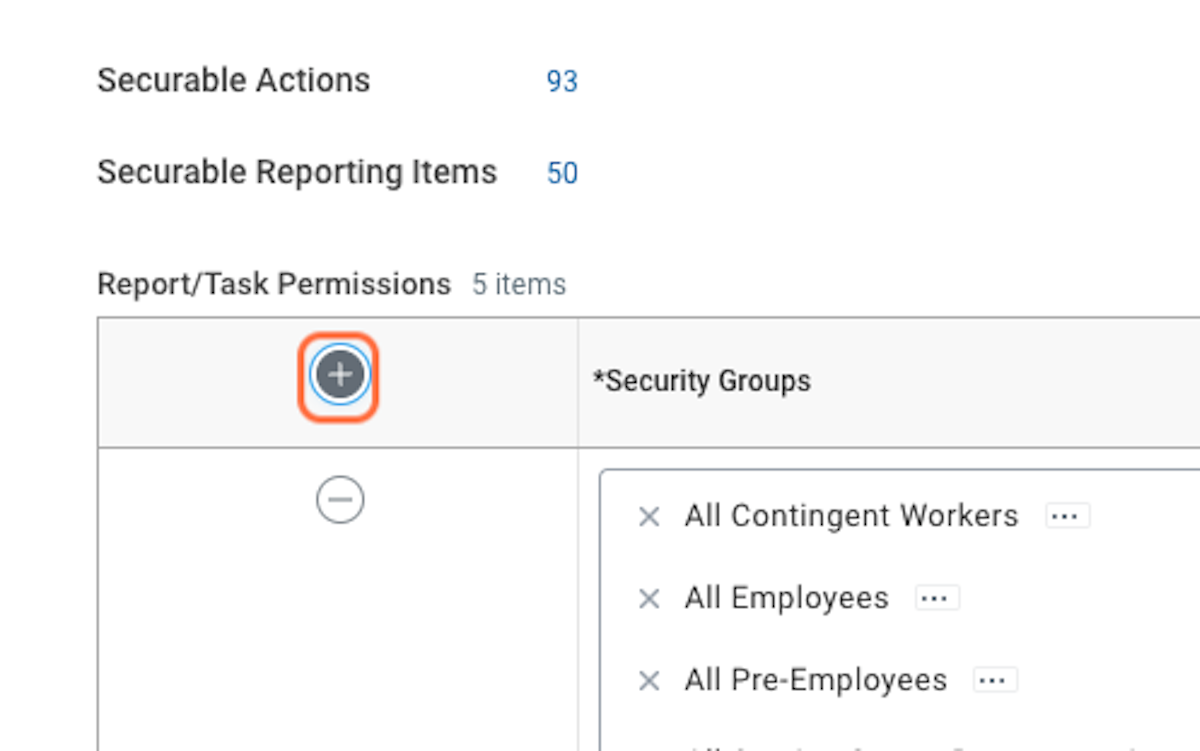
37. This time you just need to check the "View" checkbox
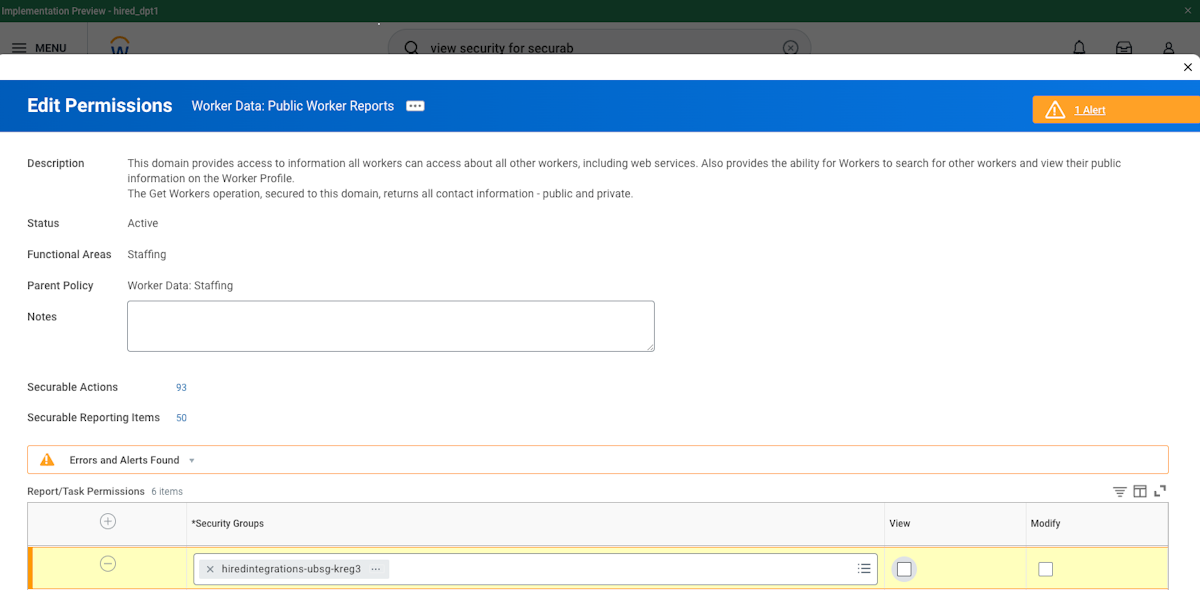
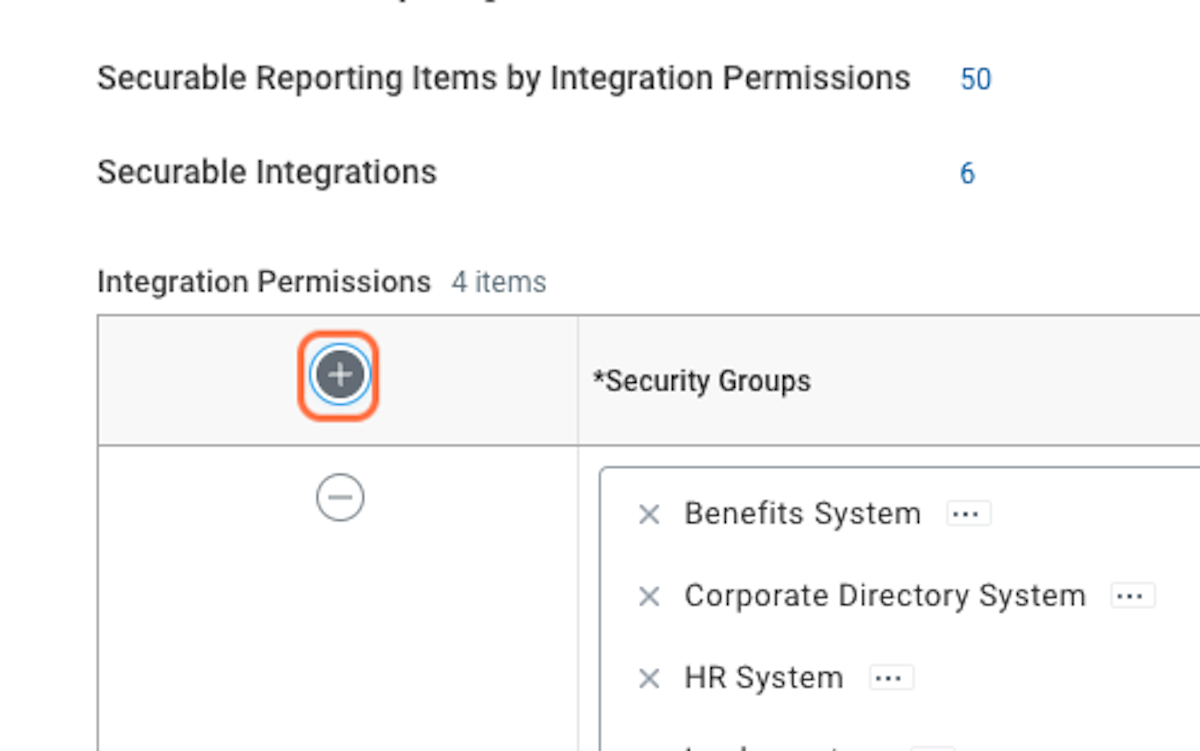
38. Repeat the step above in the "Integration Permissions" section, this time you only need to select the "Get" checkbox. Click OK
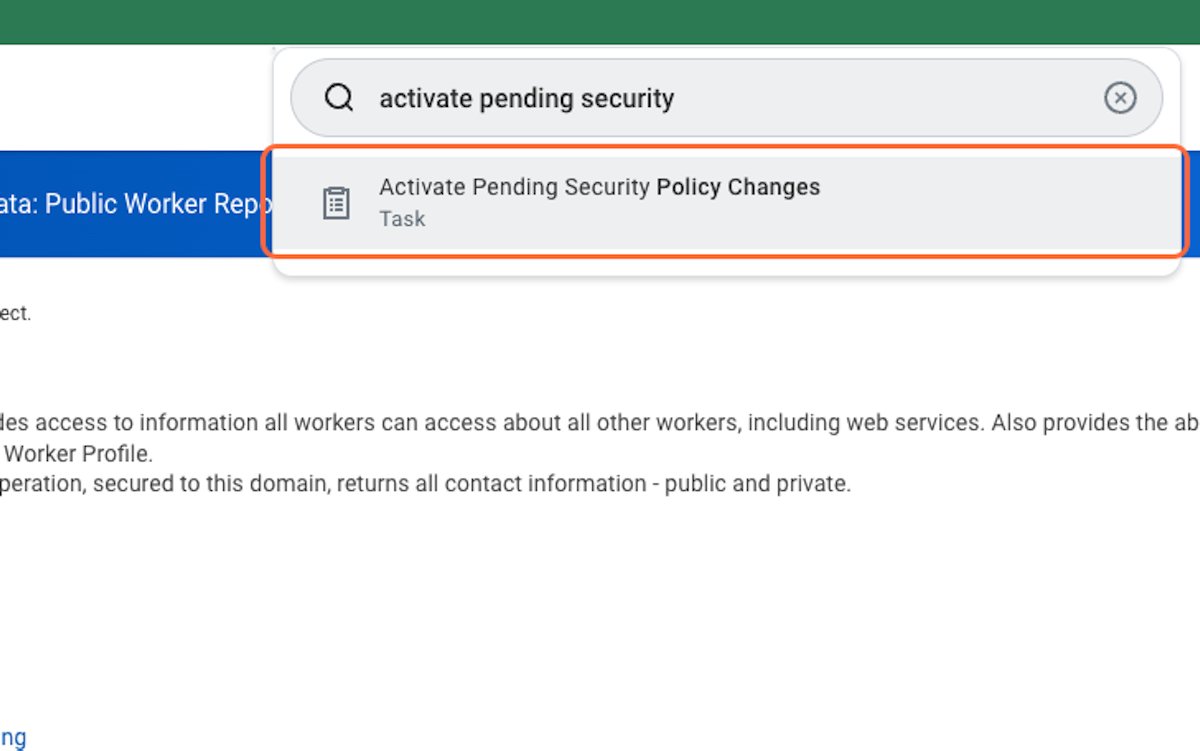
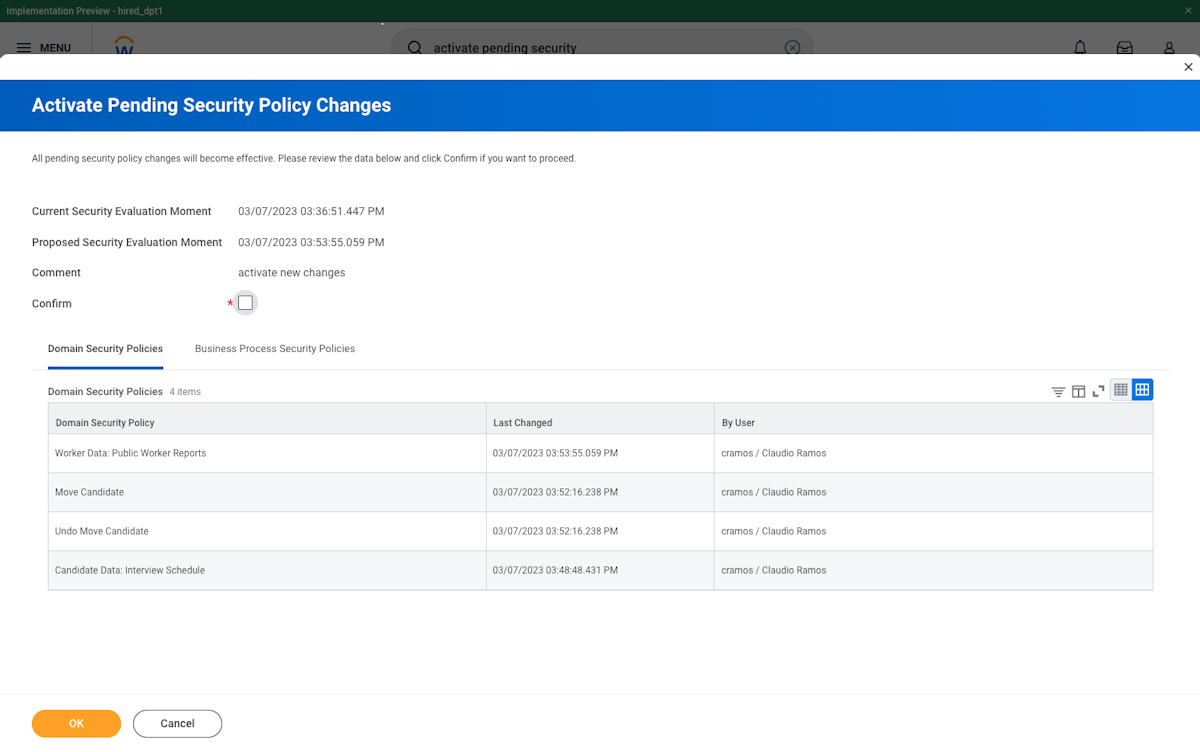
39. Search for "activate pending security policy changes"
40. Enter any text into the comment box and click OK
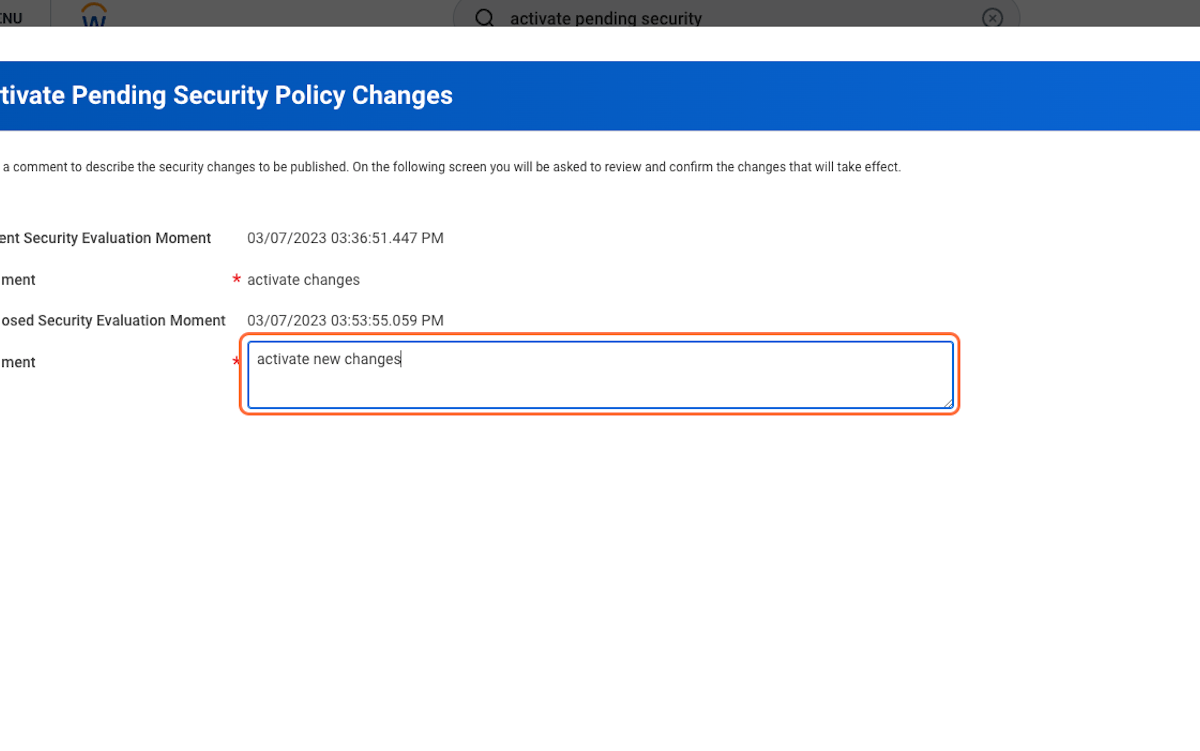
41. Click the required "Confirm" text box on the next page and click OK
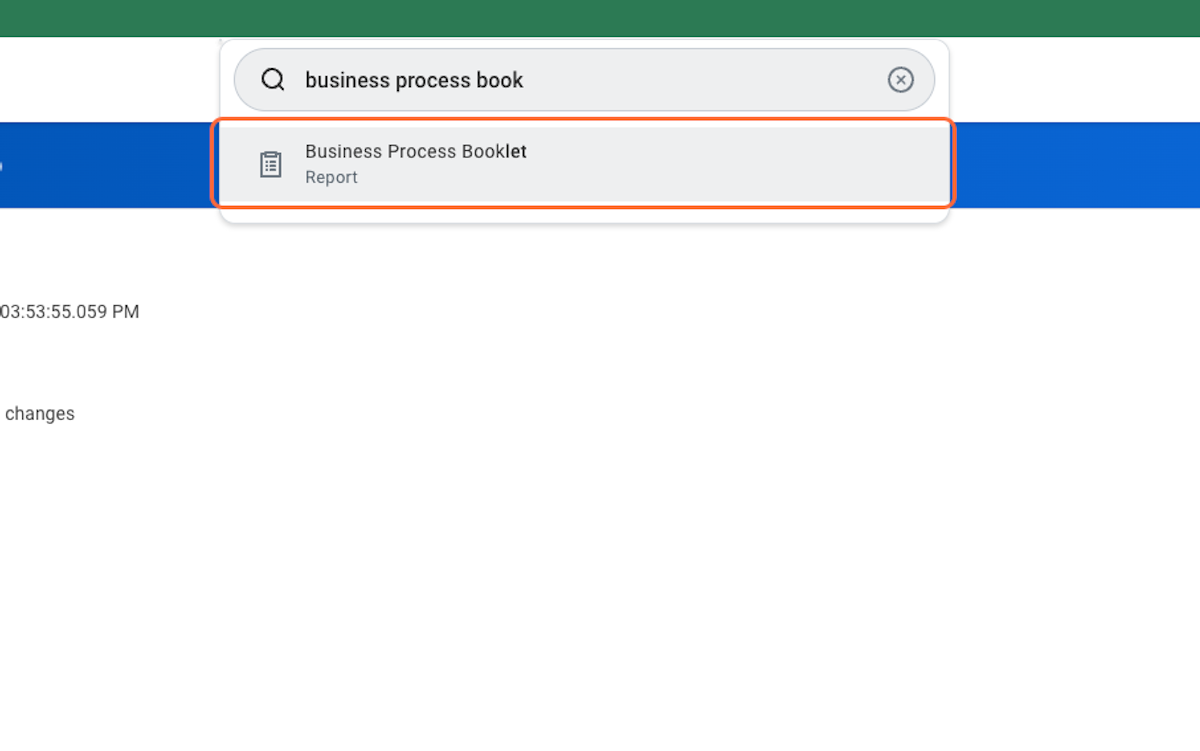
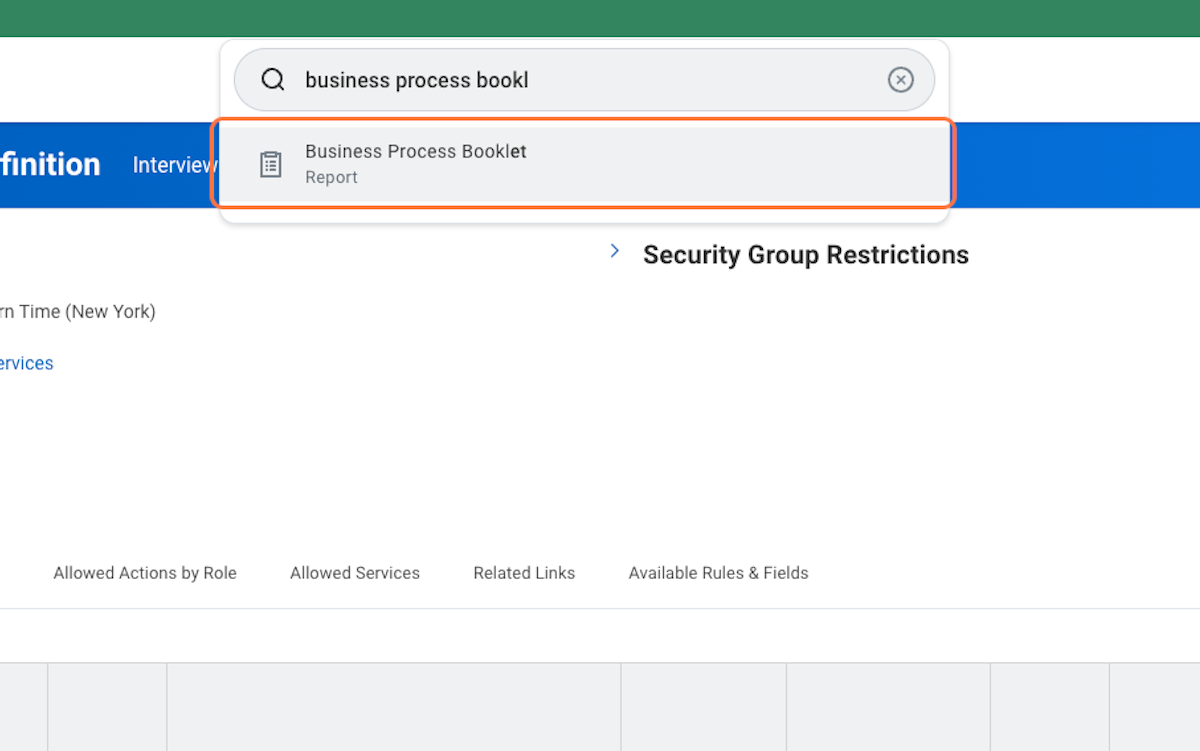
42. Search for "Business Process Booklet"
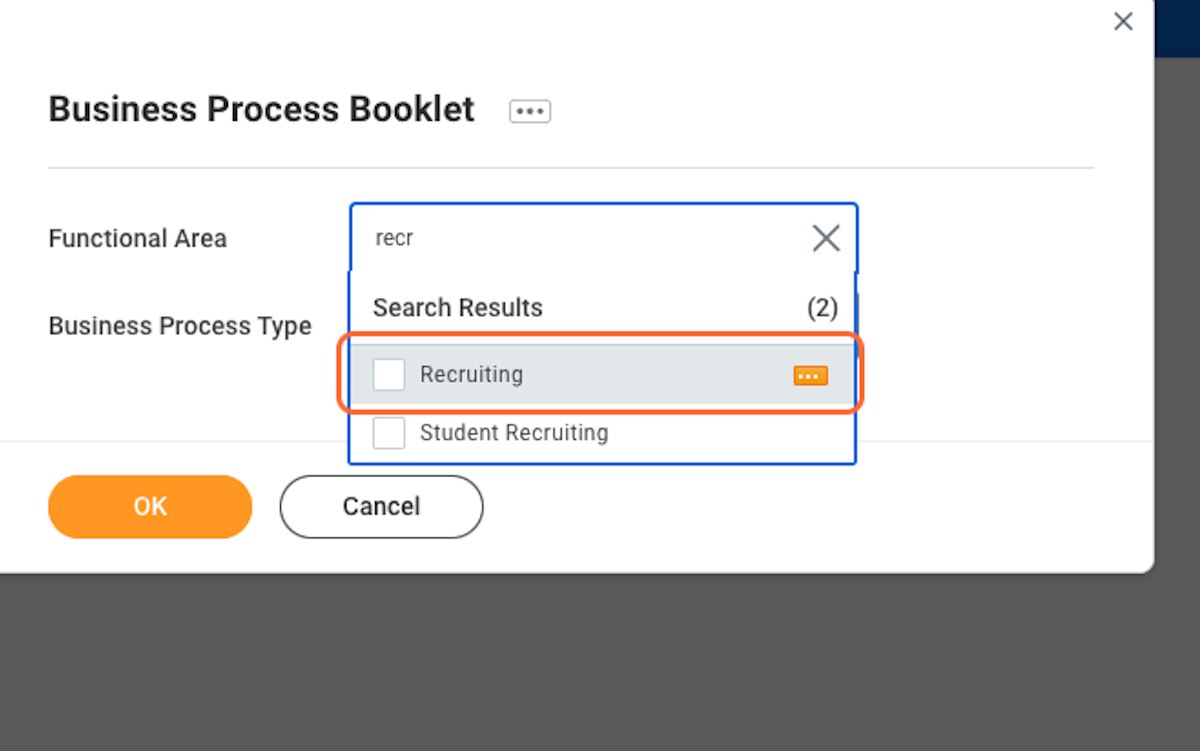
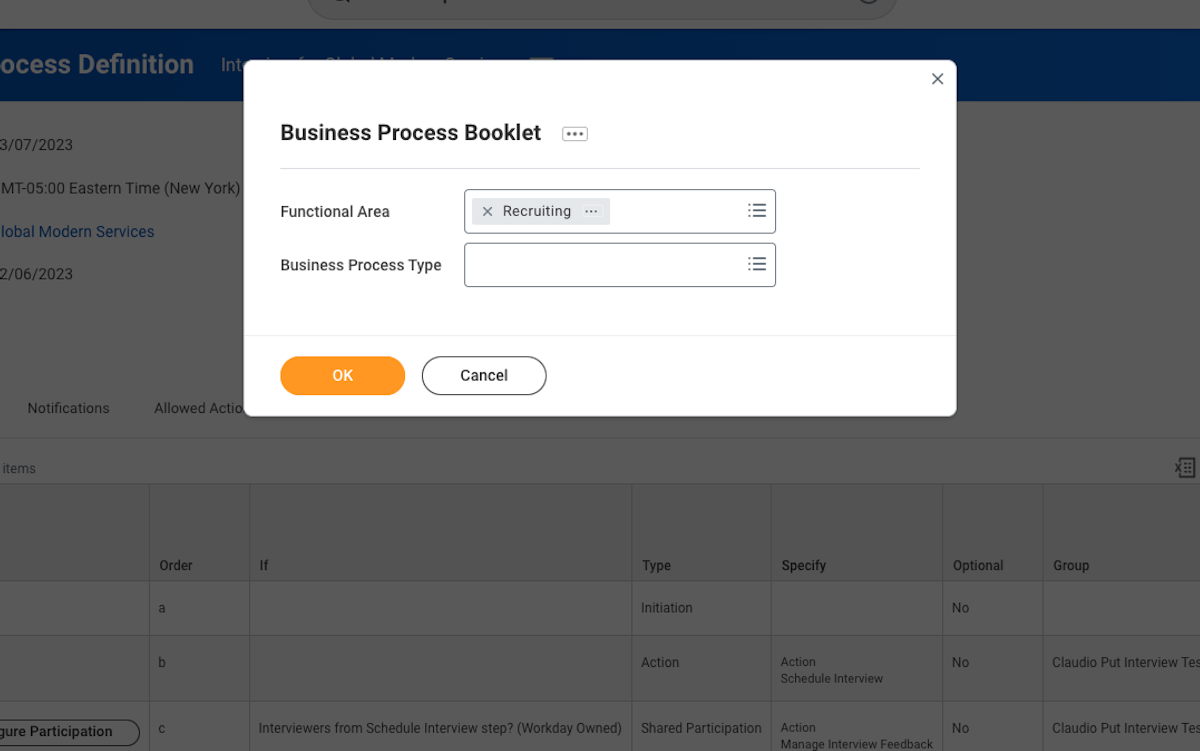
43. Search for and select "Recruiting" in the "Functional Area" box
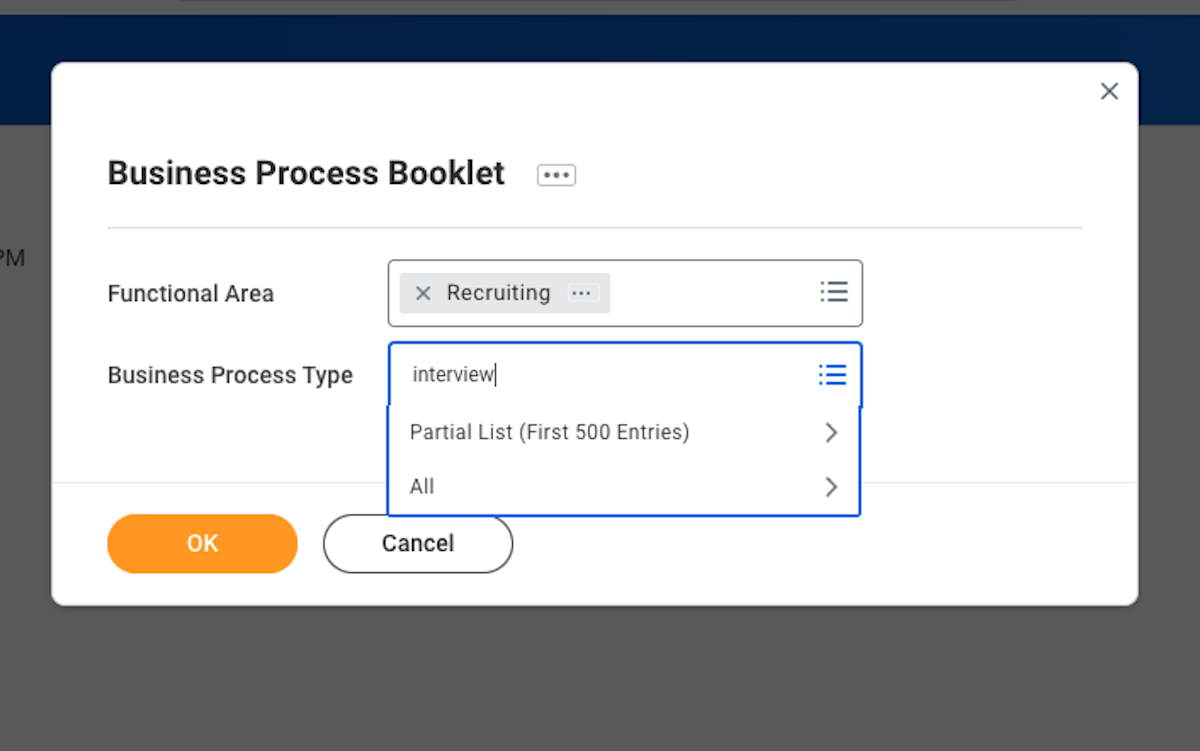
44. Search for and select "Interview" in the "Business Process Type" box
45. In the table that appears, hover over "Interview for Global Modern Services" and click the menu button
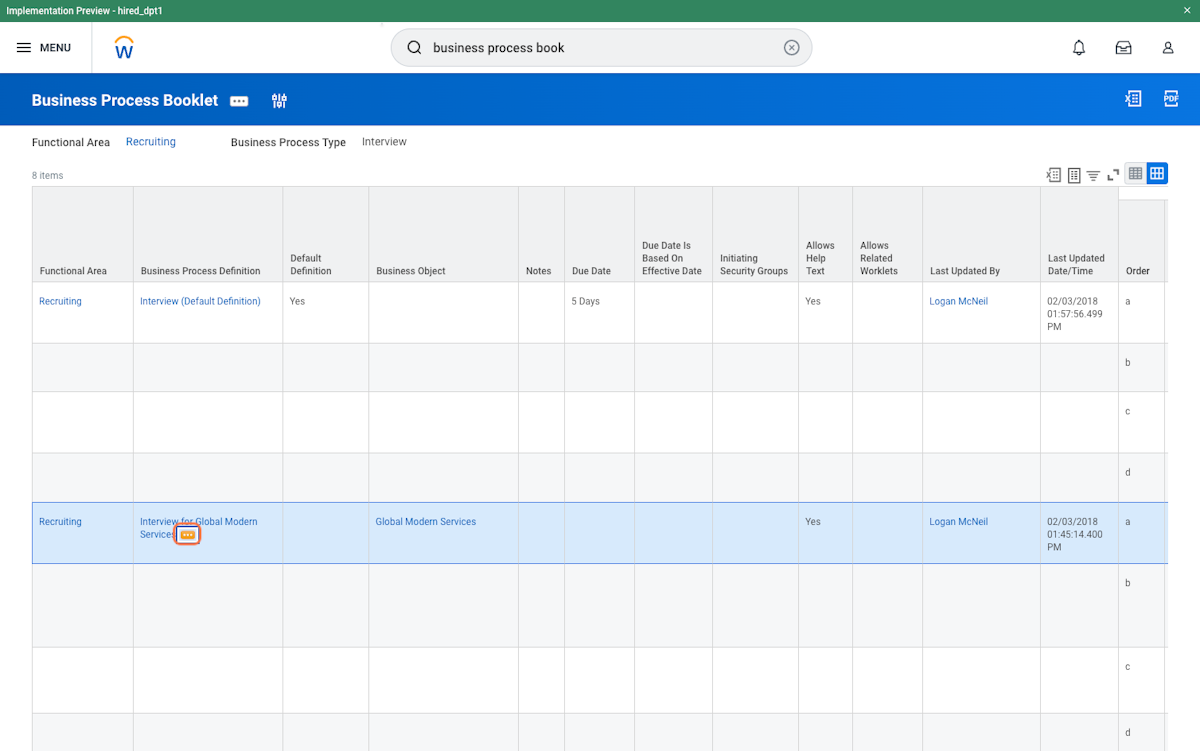
46. Hover over "Business Process" and select "Edit Definition"
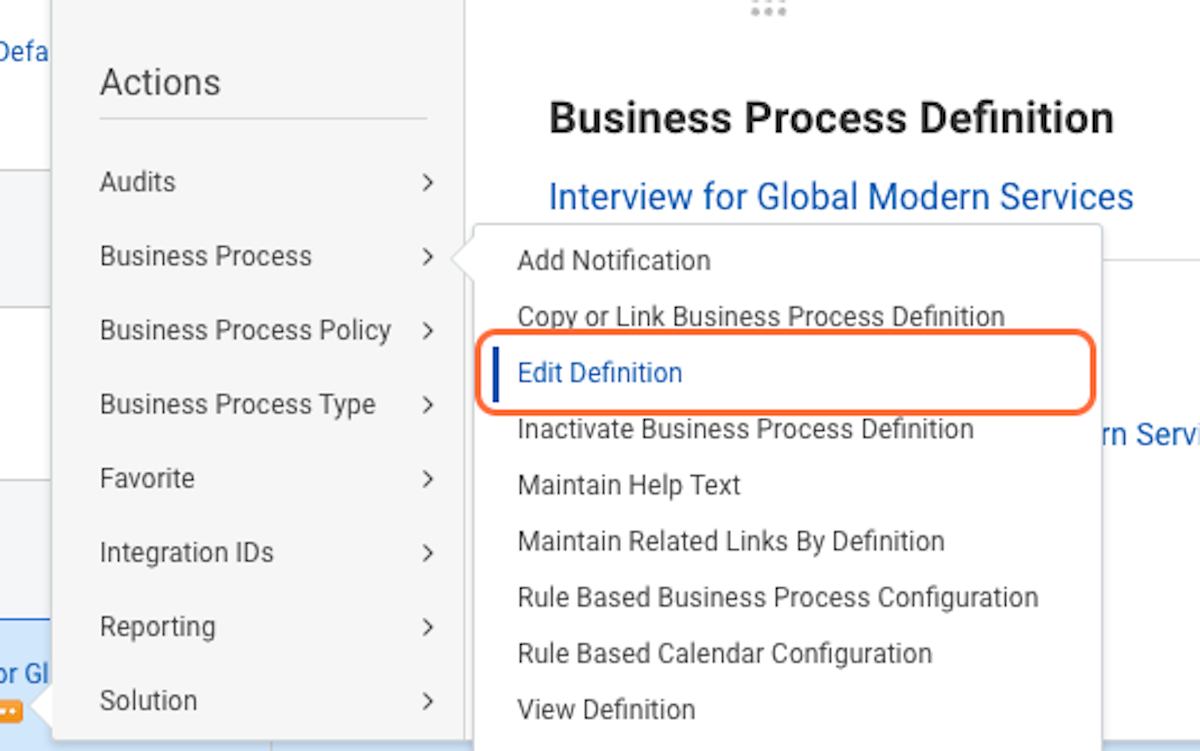
47. Click OK on the modal that appears
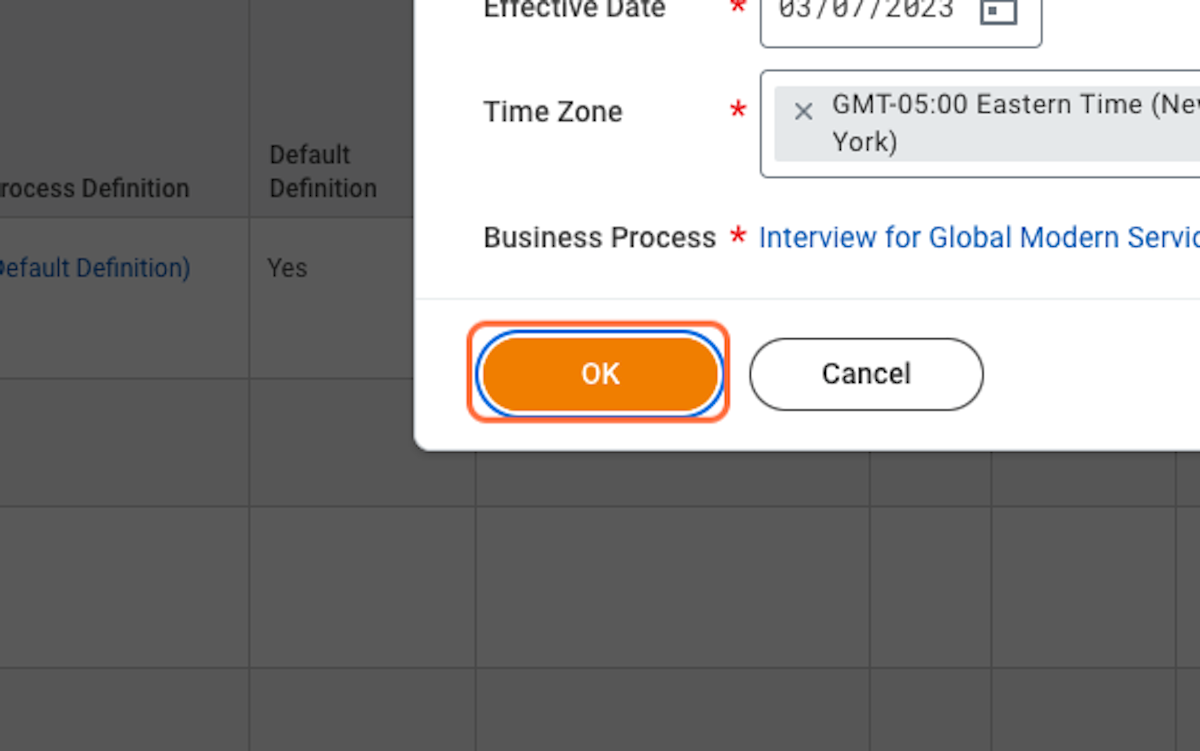
48. Find the 'Specify' column in the table and look for the 'Schedule Interview' row. Then add your User Based Security Group to the list of groups and click OK
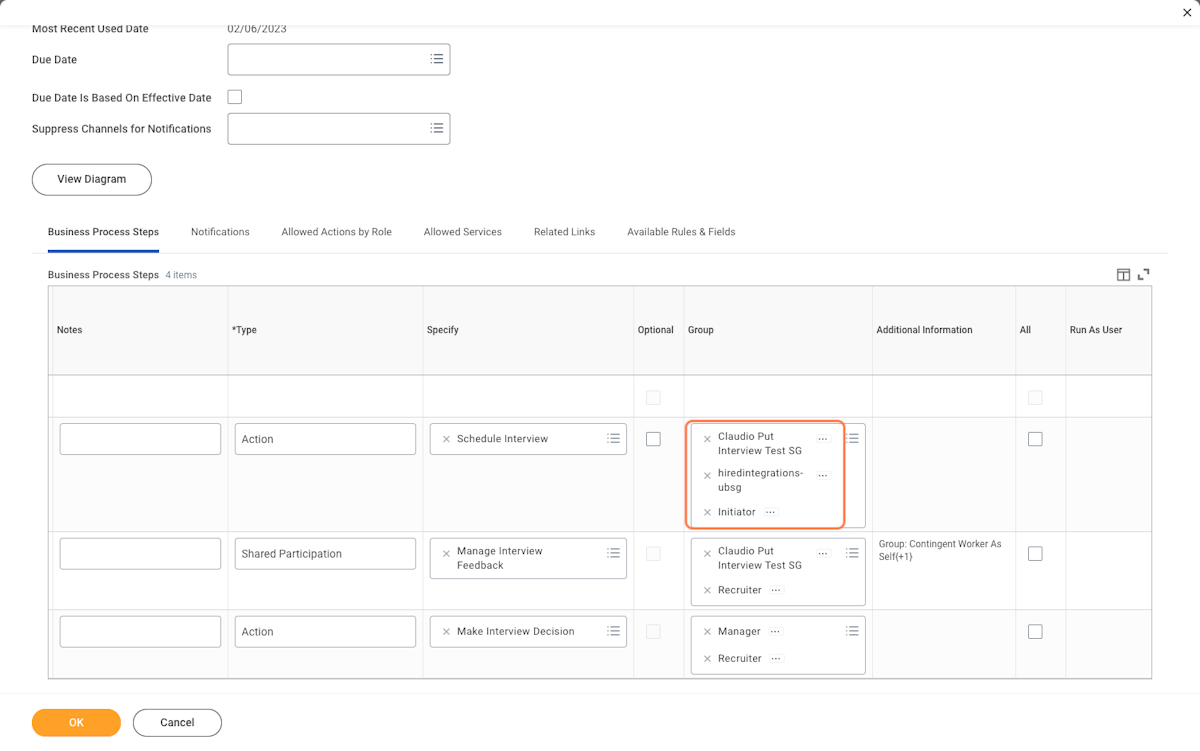
49. Search for "business process booklet"
50. Search for and select "Recruiting" as the Functional Area
51. Search for and select "Job Application" as the Business Process Type, and press OK
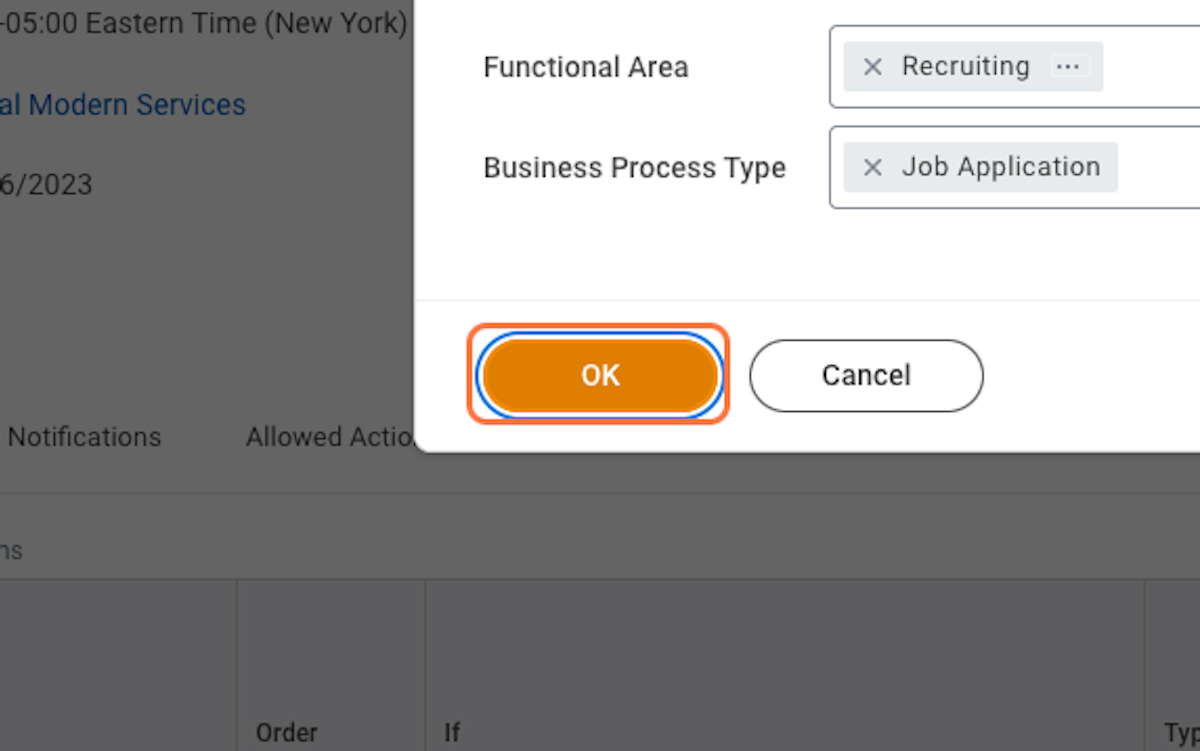
52. Hover over "Job Application for Global Modern Services" and click the menu button
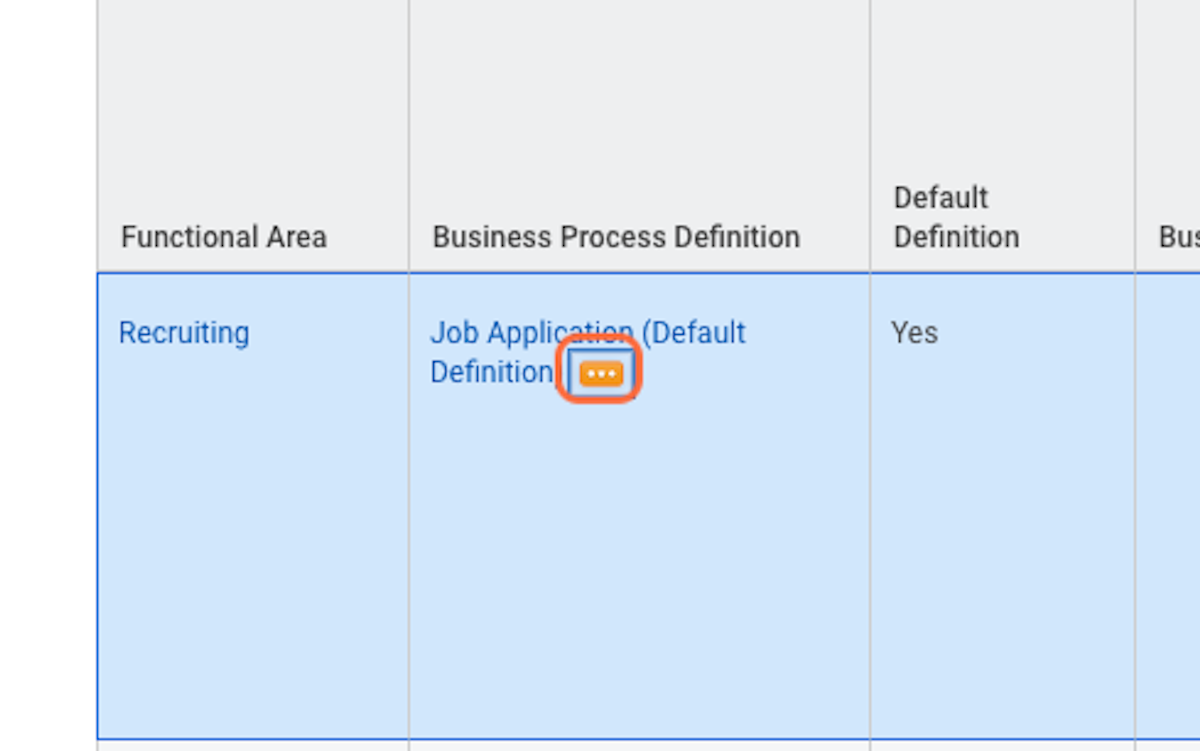
53. Hover over "Business Process" and click on "Edit Dynamic Definition"
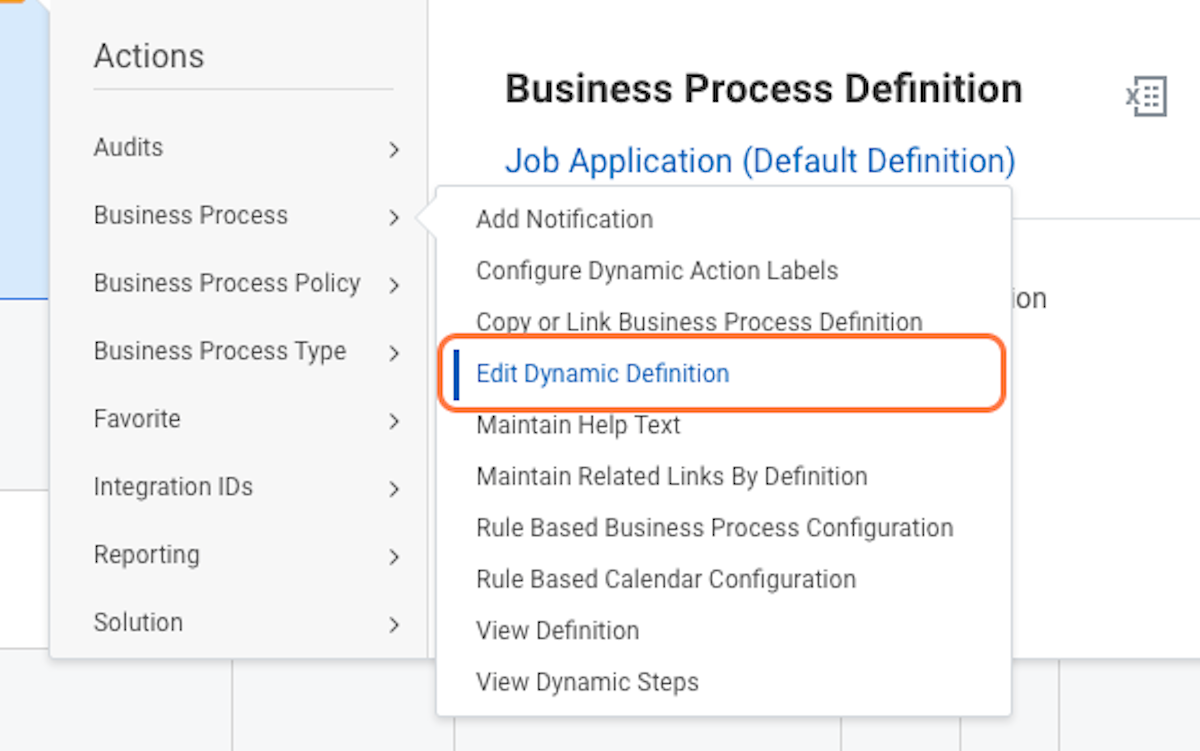
54. Click OK on the modal that appears
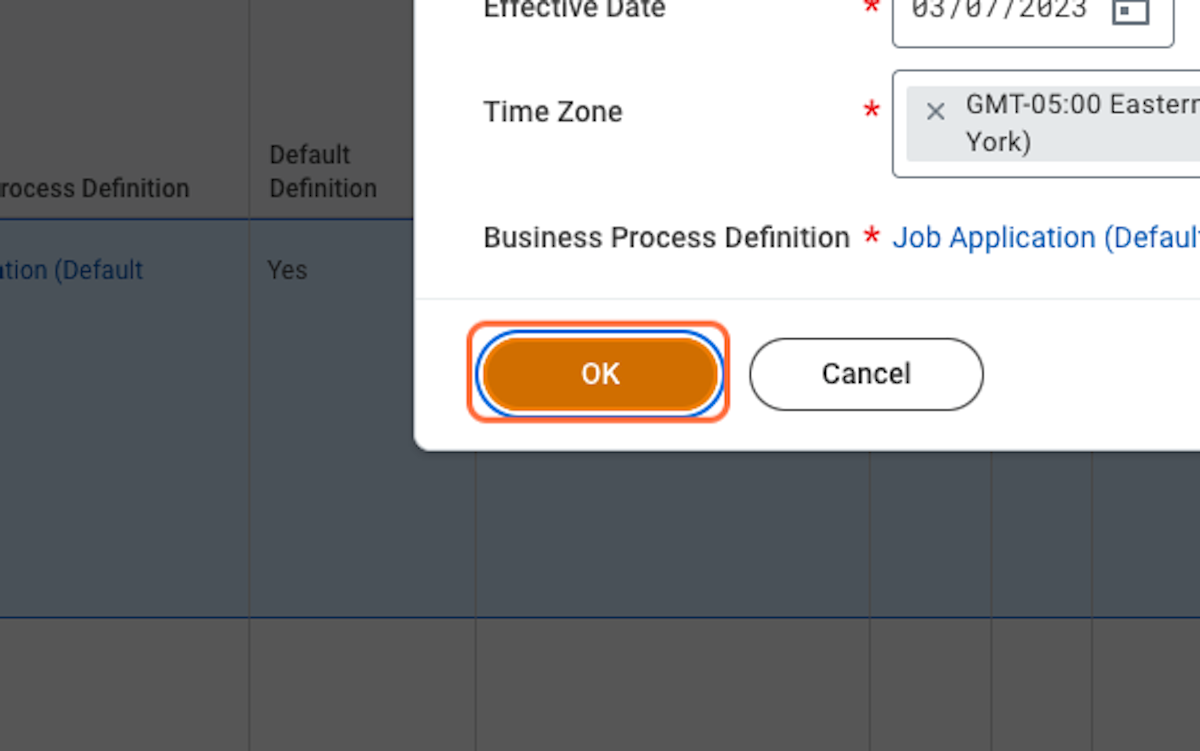
55. Click on the + below possible next steps
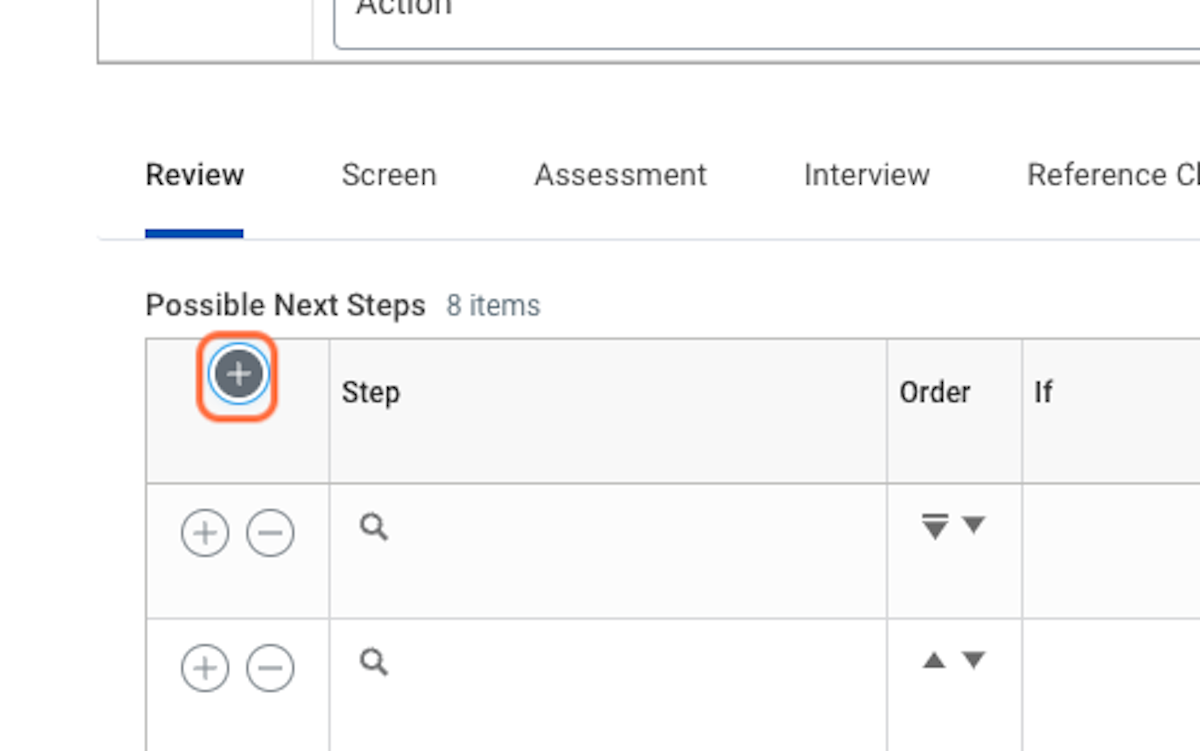
56. In the "Specify" column search for and select "Interview". In the Group column search for and select "Recruiter", and click OK
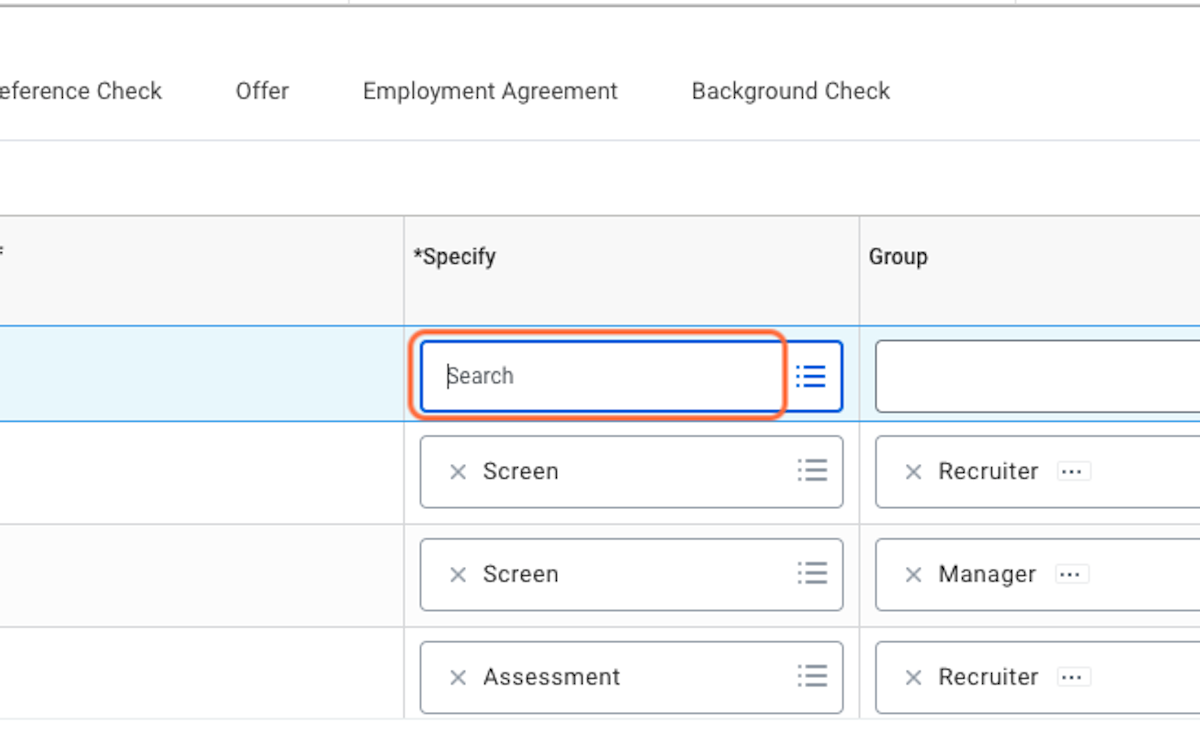
57. In the new row you just created hover over the magnifying glass and click the menu button that appears
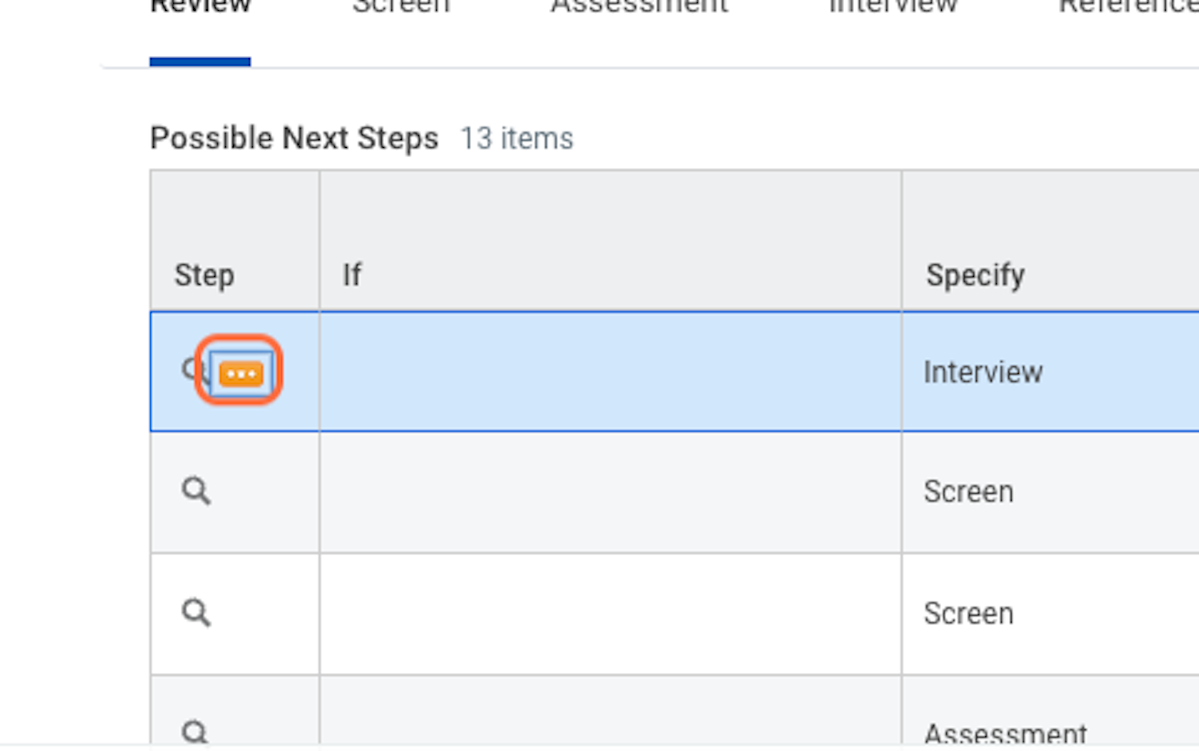
58. Hover over 'Integration IDs' and select 'Edit Reference ID'
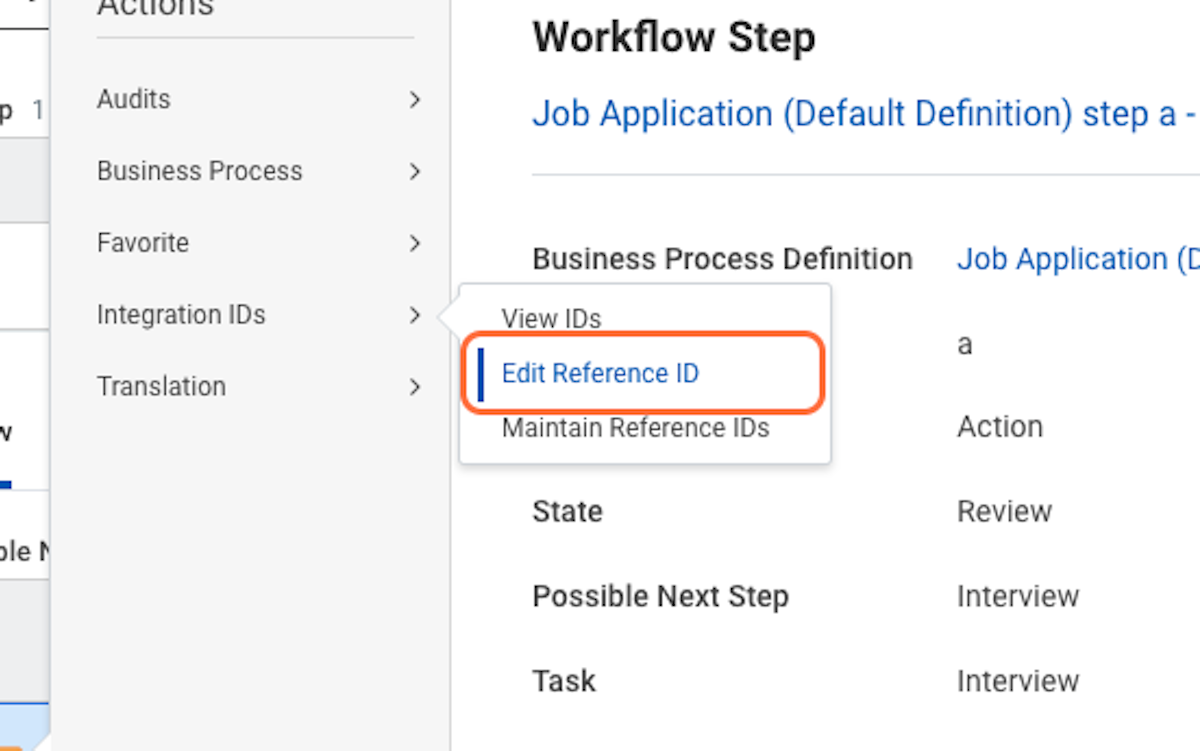
59. Enter 'HIRED_REVIEW_TO_INTERVIEW_WORKFLOW_STEP' as the Reference ID Value and click OK, and then Done.
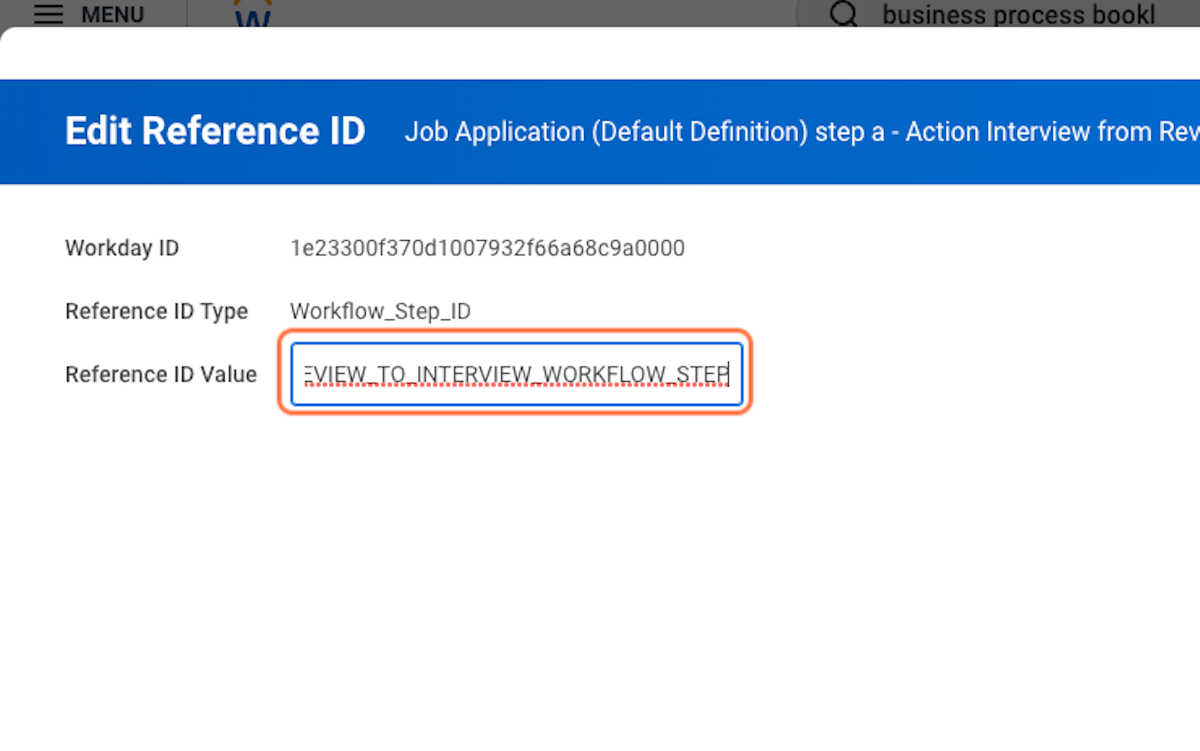
60. Find "Job Application for Global Modern Services" again and click the menu button
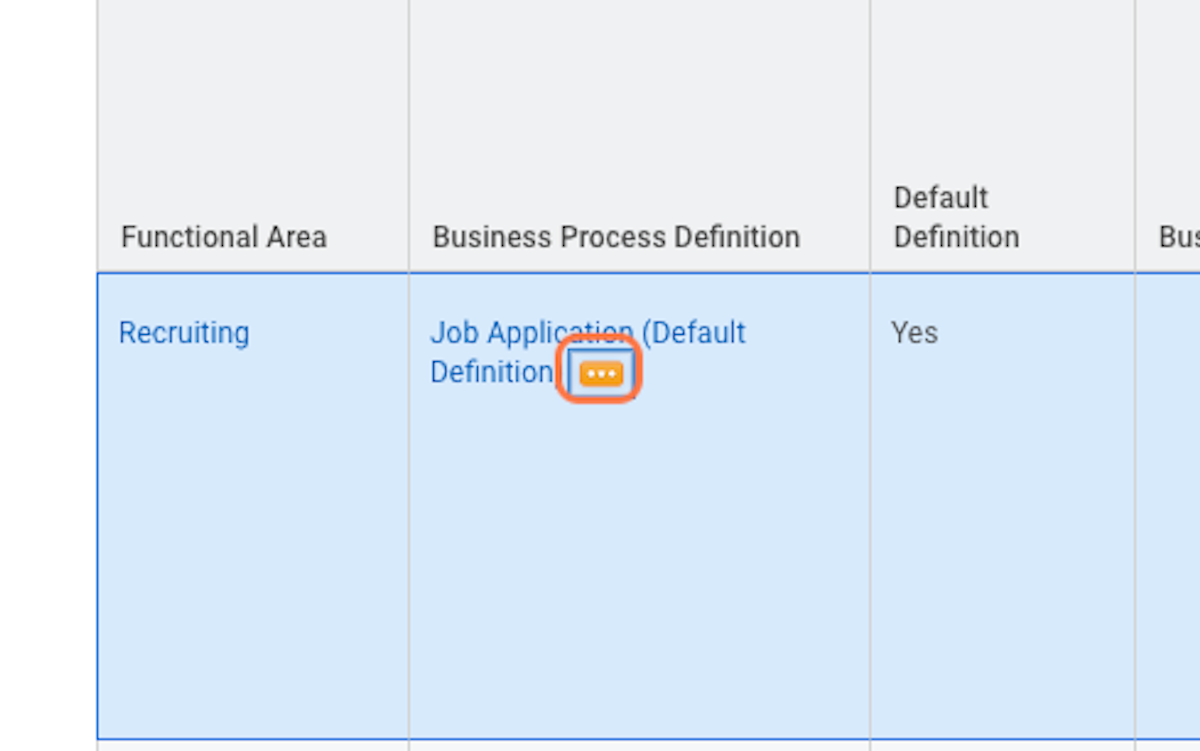
61. Click OK
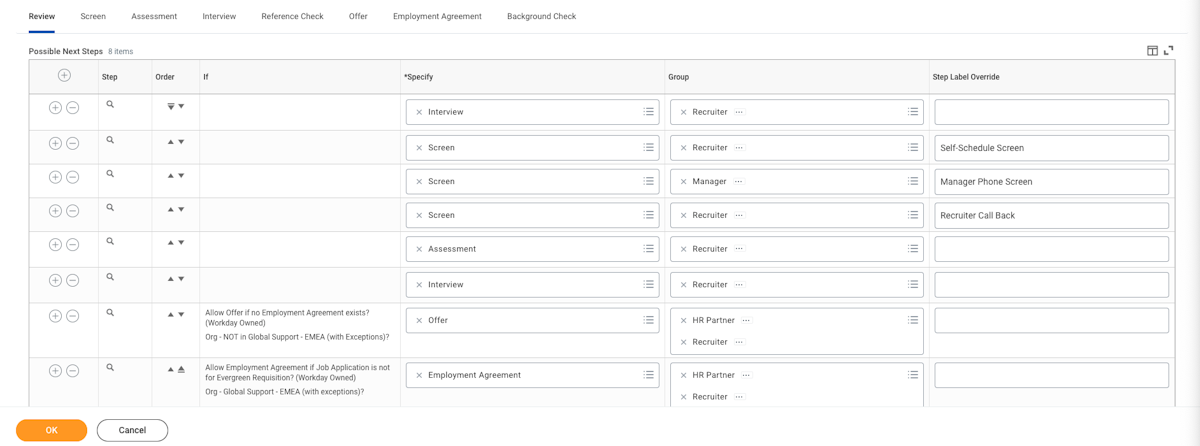
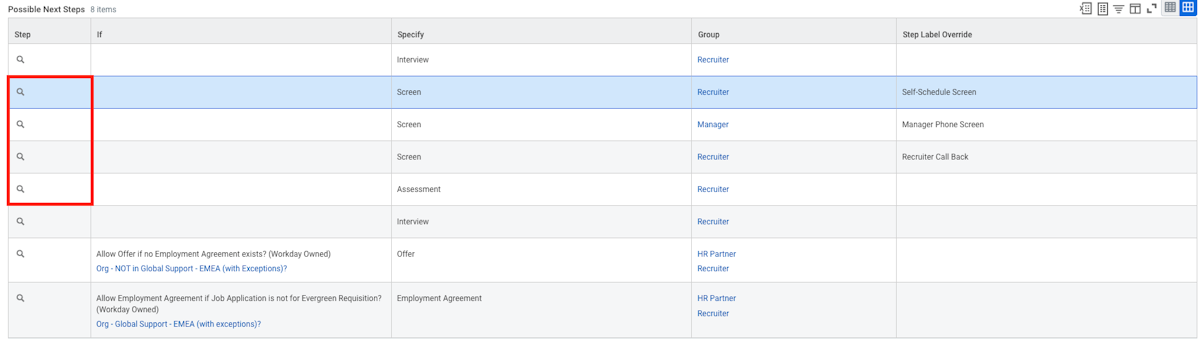
62. Follow step 58 and 59 to change the reference ID value for each row for Screens, and Assessments
Note you can only use a reference ID value once, and since there are multiple screen steps we recommend appending a number to the screen ID for each step
Example
"HIRED_SCREEN_TO_INTERVIEW_WORK2"
"HIRED_SCREEN_TO_INTERVIEW_WORK3"
"HIRED_SCREEN_TO_INTERVIEW_WORK4"
You can use "HIRED_ASSESSMENT_TO_INTERVIEW_WORKFLOW_STEP" for the assessment step